
Tutorial - Searching for and Acquiring the Components in Altium Designer
Main page: Searching for Manufacturer Parts
A real-world component that gets mounted on the board is represented as a schematic symbol during design capture and as a PCB footprint for board design. Components for a PCB design project can be created in your company's Workspace library, from where they are then placed using the Components panel.
A new Workspace library component is created using the Component editor (that can operate in either the Single Component Editing or Batch Component Editing mode), where you can define all component data (schematic symbol, PCB footprint, parameters, part choices, etc.) manually or use data provided through the Manufacturer Part Search panel. This panel gives you instant and up-to-date access to a powerful component search and aggregation system, detailing millions of components from thousands of manufacturers, each with real-time supply chain information. Many of the components have a symbol and a footprint.
A new Workspace library component can be created based on the data of any part in the Manufacturer Part Search panel – that effectively means that any listed part can be acquired to your Workspace. This involves creating a new component using the Component editor in its Single Component Editing mode, pre-filled with information from the selected part.
For this tutorial, all required components will be created in your connected Workspace using the manufacturer part data.
Finding and Acquiring the Transistor
-
Open the Manufacturer Part Search panel. To do this, click the
 button at the bottom right of the design space and select Manufacturer Part Search from the menu.
-
In the Search field at the top of the panel, type
transistor bc547and pressEnter. Search results will be presented in the panel.
-
Click the entry of the BC547CG transistor from ON Semiconductor to select it in the results grid. Click the SPNs link that appears to explore the part availability.

-
The
 icon in a part entry means that there are models assigned to this part. Display the Details pane (if not already shown) using the
  button so that you can explore the details of the selected part, including its parameters and models.

-
When the transistor is selected in the panel, click the
 button in the top region of the Details pane.

-
In the Create new component dialog that opens, select the Transistors component type and click OK.

-
In the Use Component Data dialog that opens, make sure that the Show only matching with template option at the top of the dialog is disabled and enable options in header rows on the Parameters, Models, and Datasheets tabs to add all available parameters, models, and datasheets to the component, then click OK.
-
The Component editor will open in its Single Component Editing mode, with the chosen data loaded. At this stage, you can check that the symbol, footprint, and parameters comply with your requirements and make any required updates.

-
Click the Save to Server control next to the component entry in the Projects panel.

-
In the Edit Revision for Item dialog that opens, type in a meaningful comment to the component revision release into the Release Notes field (e.g.,
Initial release of the transistor component saved from Manufacturer Part Search), then click OK. A status dialog will open while the component is saved to the Workspace. When this is complete, the Component editor will close.


Finding and Acquiring the Capacitor
-
Return to the Manufacturer Part Search panel and use the panel's Search field to search for
capacitor 22 nF 16 V 0603. -
Select the entry of the C0603C223J4RACTU capacitor from KEMET in the search result grid and click the
button in the Details pane.
-
In the Create new component dialog that opens, select the Capacitors component type and click OK.
-
In the Use Component Data dialog that opens, make sure that the Show only matching with template option at the top of the dialog is disabled and enable options in header rows on the Parameters, Models, and Datasheets tabs to add all available parameters, models, and datasheets to the component, then click OK.
-
The Component editor will open. In the Name field in the Component region at the top left of the editor, change the component name to
Capacitor 22nF +/-5% 16V 0603.
-
Click the Save to Server control next to the component entry in the Projects panel.
-
In the Edit Revision for Item dialog that opens, type in a meaningful comment to the component revision release into the Release Notes field (e.g.,
Initial release of the capacitor component saved from Manufacturer Part Search), then click OK. A status dialog will open while the component is saved to the Workspace. When this is complete, the Component editor will close.
Finding and Acquiring the Resistors
-
Return to the Manufacturer Part Search panel and use the panel's Search field to search for
resistor 100 K 5% 0805. -
Select the entry of the ERJ-6GEYJ104V resistor from Panasonic in the search result grid and click the
button in the Details pane.
-
In the Create new component dialog that opens, select the Resistors component type and click OK.
-
In the Use Component Data dialog that opens, make sure that the Show only matching with template option at the top of the dialog is disabled and enable options in header rows on the Parameters, Models, and Datasheets tabs to add all available parameters, models, and datasheets to the component, then click OK.
-
In the Name field in the Component region at the top left of the Component editor, change the component name to
Resistor 100K +/-5% 0805 125 mW. -
Click the Save to Server control next to the component entry in the Projects panel.
-
In the Edit Revision for Item dialog that opens, type in a meaningful comment to the component revision release into the Release Notes field (e.g.,
Initial release of the resistor component saved from Manufacturer Part Search), then click OK. A status dialog will open while the component is saved to the Workspace. When this is complete, the Component editor will close. -
Return to the Manufacturer Part Search panel and use the panel's Search field to search for
resistor 1 K 5% 0805. -
Select the entry of the ERJ-P06J102V resistor from Panasonic in the search result grid and click the
button in the Details pane.
-
In the Create new component dialog that opens, select the Resistors component type and click OK.
-
In the Use Component Data dialog that opens, make sure that the Show only matching with template option at the top of the dialog is disabled and enable options in header rows on the Parameters, Models, and Datasheets tabs to add all available parameters, models, and datasheets to the component, then click OK.
-
In the Name field in the Component region at the top left of the Component editor, change the component name to
Resistor 1K +/-5% 0805 500 mW. -
Click the Save to Server control next to the component entry in the Projects panel.
-
In the Edit Revision for Item dialog that opens, type in a meaningful comment to the component revision release into the Release Notes field (e.g.,
Initial release of the resistor component saved from Manufacturer Part Search), then click OK. A status dialog will open while the component is saved to the Workspace. When this is complete, the Component editor will close.
Finding and Acquiring the Connector
-
The last component to find is a 2-pin header. Return to the Manufacturer Part Search panel. This time you will use the panel's faceted searching capabilities.
-
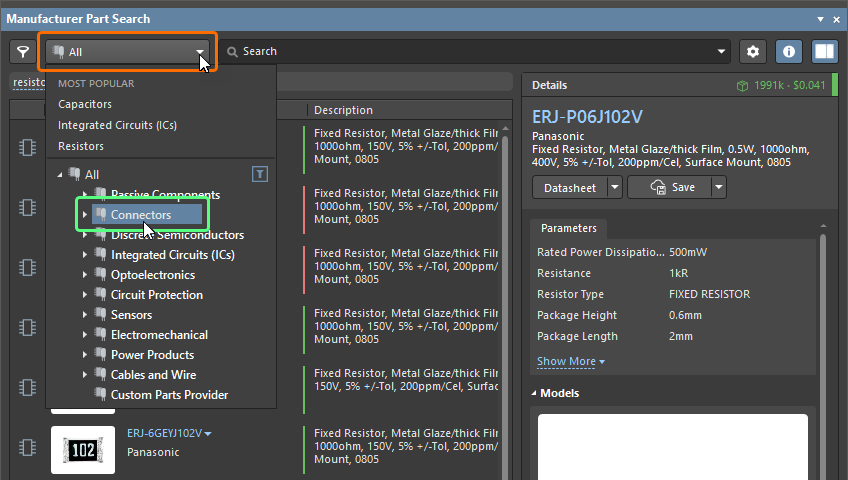
In the Categories drop-down at the top left of the panel, expand the All entry and select the Connectors category.
-
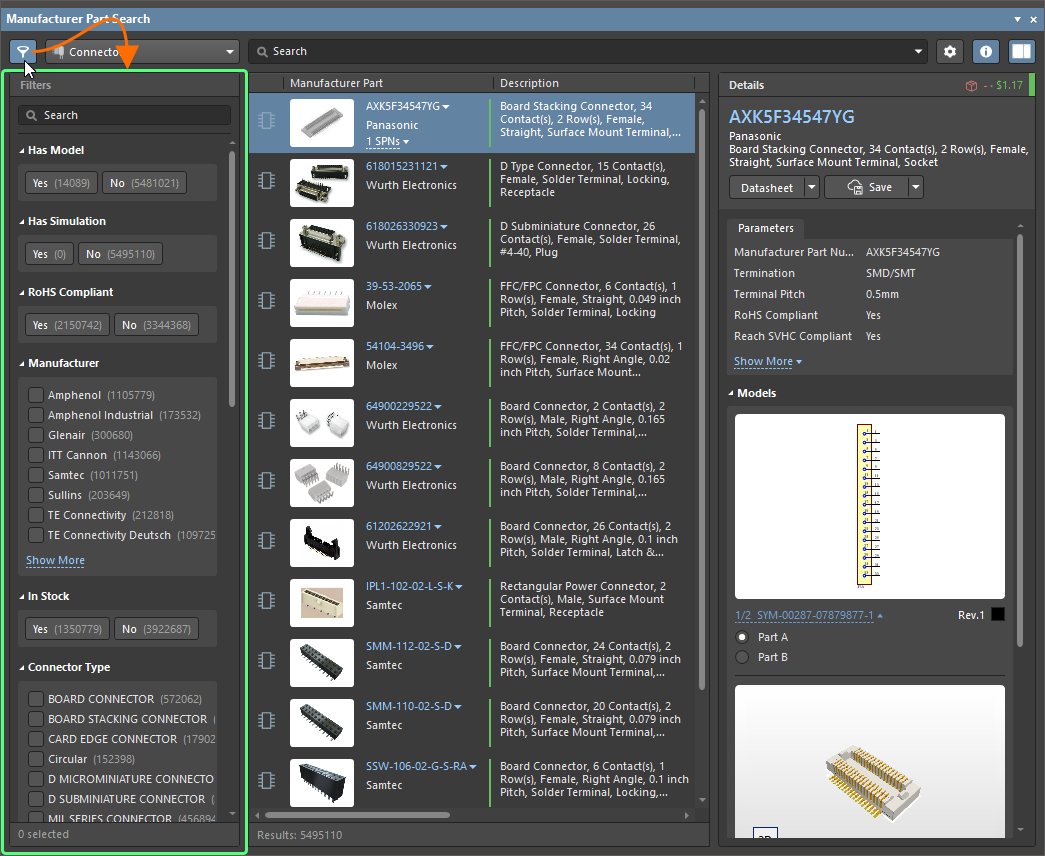
Click the
 button to display the Filters pane if it is not already shown.
-
Click the Show more filters link at the bottom of the Filters pane to display all of the available filters (rather than the most commonly used filters).

-
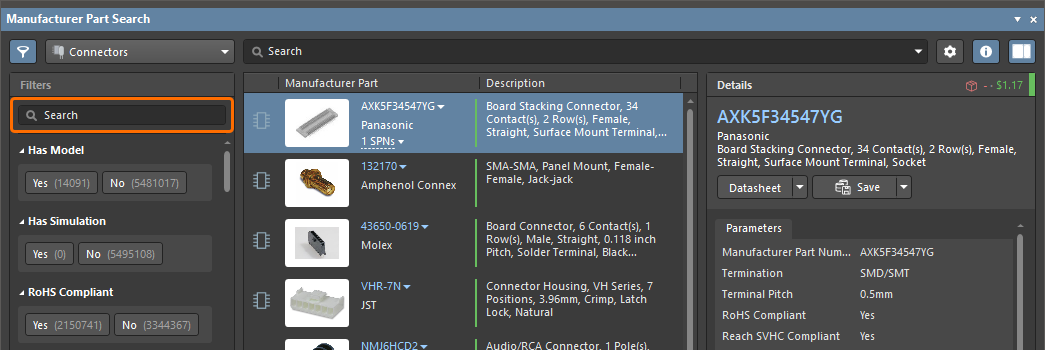
An efficient way of working with the filters is to use the Search field at the top of the Filters pane (
 ). Searching returns strings that match in either the filter name or in the filter settings. Using the following search terms, apply the filters and select the options listed below:
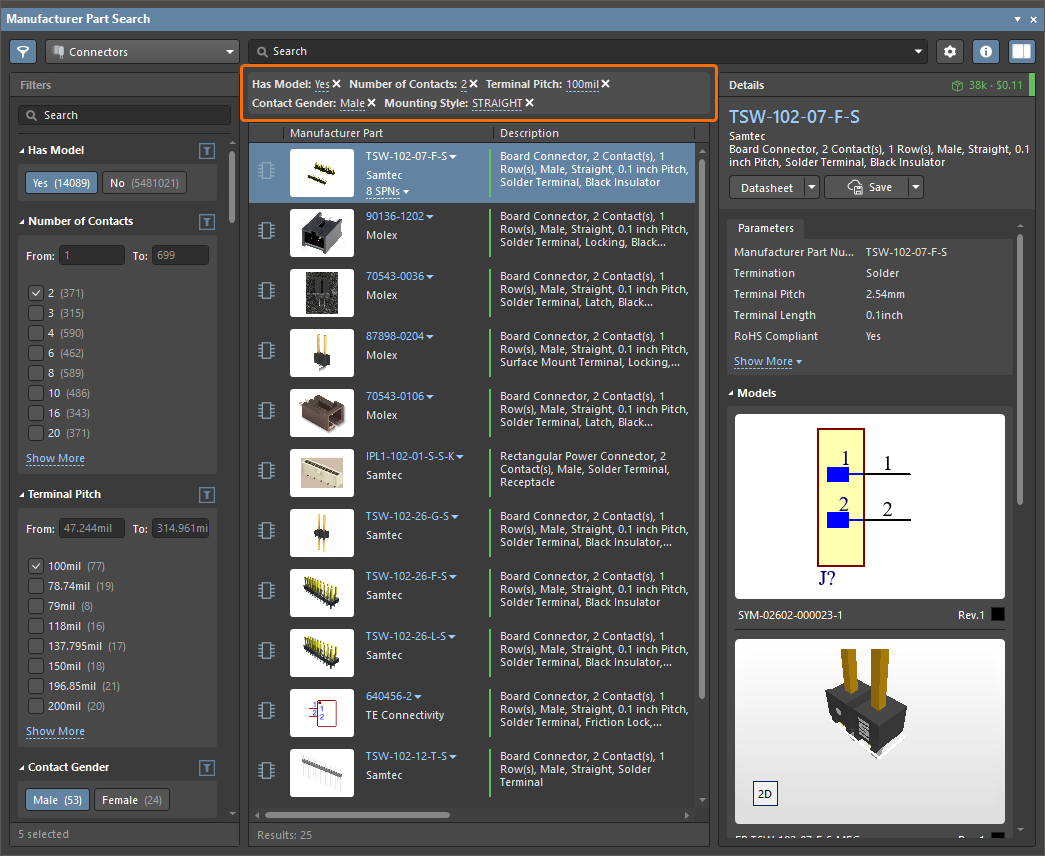
Search for Choose has modelHas Model = Yes contactsNumber of Contacts = 2 pitchTerminal Pitch = 100mil maleContact Gender = Male straightMounting Style = STRAIGHT The currently selected filter options are shown below the search bar.
-
A small number of 2-pin vertical male headers should be returned, as shown above. Select a suitable 2-pin vertical male connector with a pin pitch of 2.54 mm (0.1 in) from the search results, such as TSW-102-26-F-S from Samtec and click the
button in the Details pane.
-
In the Create new component dialog that opens, select the Connectors component type and click OK.
-
In the Use Component Data dialog that opens, make sure that the Show only matching with template option at the top of the dialog is disabled and enable options in header rows on the Parameters, Models, and Datasheets tabs to add all available parameters, models, and datasheets to the component, then click OK.
-
In the Component editor, leave the data values at their defaults and click the Save to Server control next to the component entry in the Projects panel.
-
In the Edit Revision for Item dialog that opens, type in a meaningful comment to the component revision release into the Release Notes field (e.g.,
Initial release of the connector component saved from Manufacturer Part Search), then click OK. A status dialog will open while the component is saved to the Workspace. When this is complete, the Component editor will close.