Related pages: Processes & Workflows (Altium 365 Workspace, Enterprise Server Workspace), Creating & Managing Processes (Altium 365 Workspace, Enterprise Server Workspace)
Creating a New Process-based Workspace Project
When one or more process definitions for the Project Creations process theme are active, the ability to create a new project through the Create Project dialog is restricted to Local and VCS type projects only. Instead, the creation of Workspace-based projects comes under the control of active process definitions.
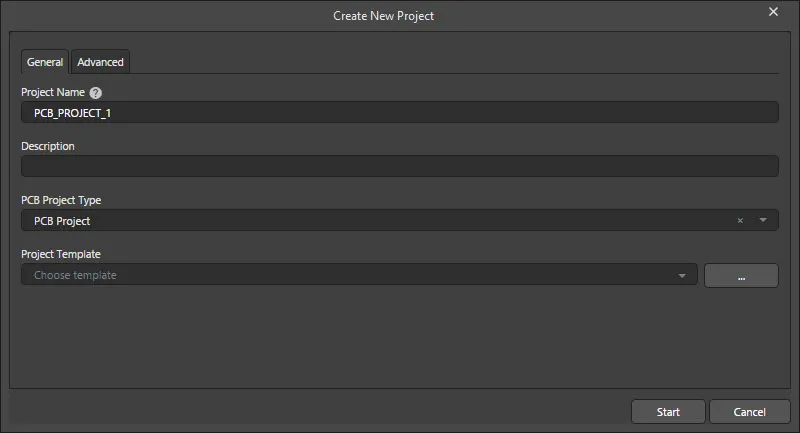
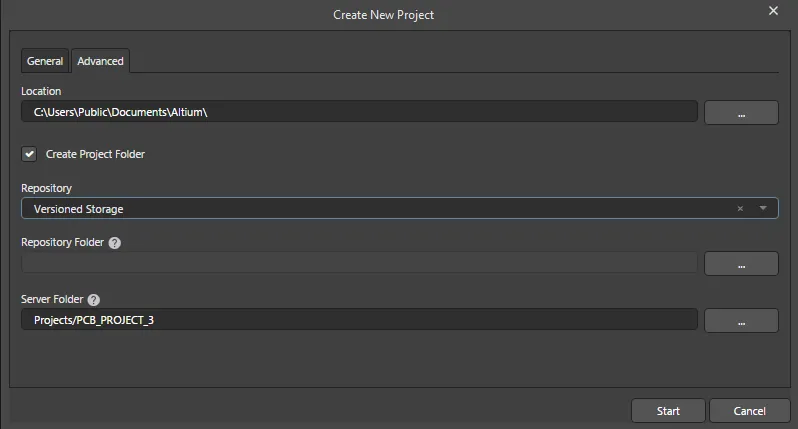
From within Altium Designer, activated process definitions that are part of the Project Creations theme can be accessed from the main File » New » Project in <WorkspaceName> sub-menu. After launching the chosen command, the Create New Project dialog (actually named after the chosen process) opens. Use the General tab of the dialog to give the project a name and description, specify its type, and assign a template, if desired. On the Advanced tab, you can specify the local working directory for the project, choose the target repository and folder and also specify in which folder, within the Workspace's folder structure, it is to reside. Once ready, click Start to create the new Workspace project in accordance with the underlying workflow for that process.
-
To use the Constraint Manager for managing the design constraints for your process-based Workspace PCB project, ensure to assign an appropriate project template when creating that project. This should be a template that was saved from a PCB project that was created with its Constraint Management option enabled in the Create Project dialog.
-
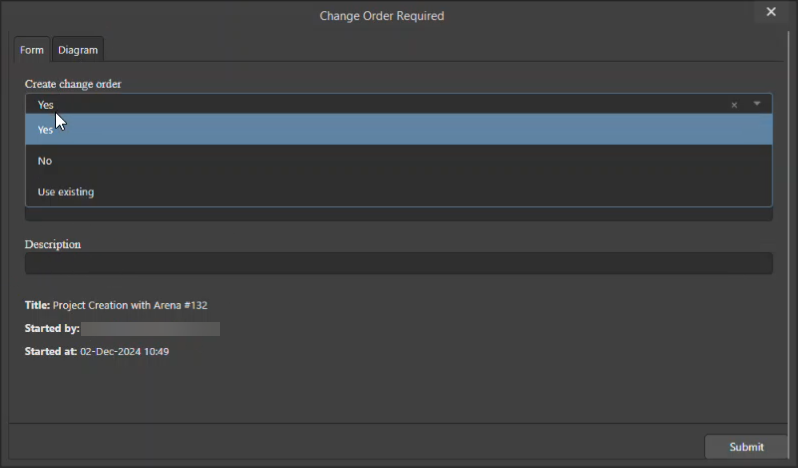
If the Change Order (ECO) workflow is configured in the PLM interface instance (learn more), an additional Change Order Form will be presented during project creation, where the Change Order's setup and options are specified ( ).
).

The dialog with which to start creation of a project, based on a define process workflow. Note that the name of the dialog will reflect the name of the chosen process.
Options and Controls of the Create New Project Dialog
General Tab

-
Project Name - enter a suitable name for the Workspace project.
The project name must start with and can contain lower or uppercase letters or 0-9. Underscores, dashes, and spaces are allowed but can only be used in the middle of the name (beginning and ending spaces will be ignored). You cannot use the following words: AUX, COM1-COM9, LPT1-LPT9, CON, NUL, or PRN. In addition, the name cannot contain the following characters: \ . / ? % * : | " < >.
-
Description - enter a meaningful description of the project.
-
PCB Project Type - use the drop-down to select a suitable project type.
-
Project Template - use the drop-down to select the desired template from a list of installed templates. Click
 to open a version of the Explorer panel (titled Select Project Template) to select the desired template.
-
Start - when clicked, the project will be created in accordance with the underlying workflow process.
Advanced Tab

-
Location - use to specify the location where the project will be located. Click
 to browse and select the desired location.
-
Create Project Folder - check to create a new project folder automatically.
-
Repository - use the drop-down to select the desired repository for the project.
-
Repository Folder - click  to open the Add to Version Control dialog in which you can specify the repository folder.
The folder name must start with and can contain lower or uppercase letters or 0-9 and underscores. dashes, and spaces are allowed but can only be used in the middle of the name (beginning and ending spaces will be ignored). You cannot use the following words: AUX, COM1-COM9, LPT1-LPT9, CON, NUL, or PRN.
-
Server Folder - use to specify the server folder. Click  to open the Choose Folder dialog in which you can choose the desired folder.
The server folder path can start with any symbol except space or slash and can contain any symbol except space at the end. Spaces are allowed in the middle of the server folder name.
Process-based Project Converting
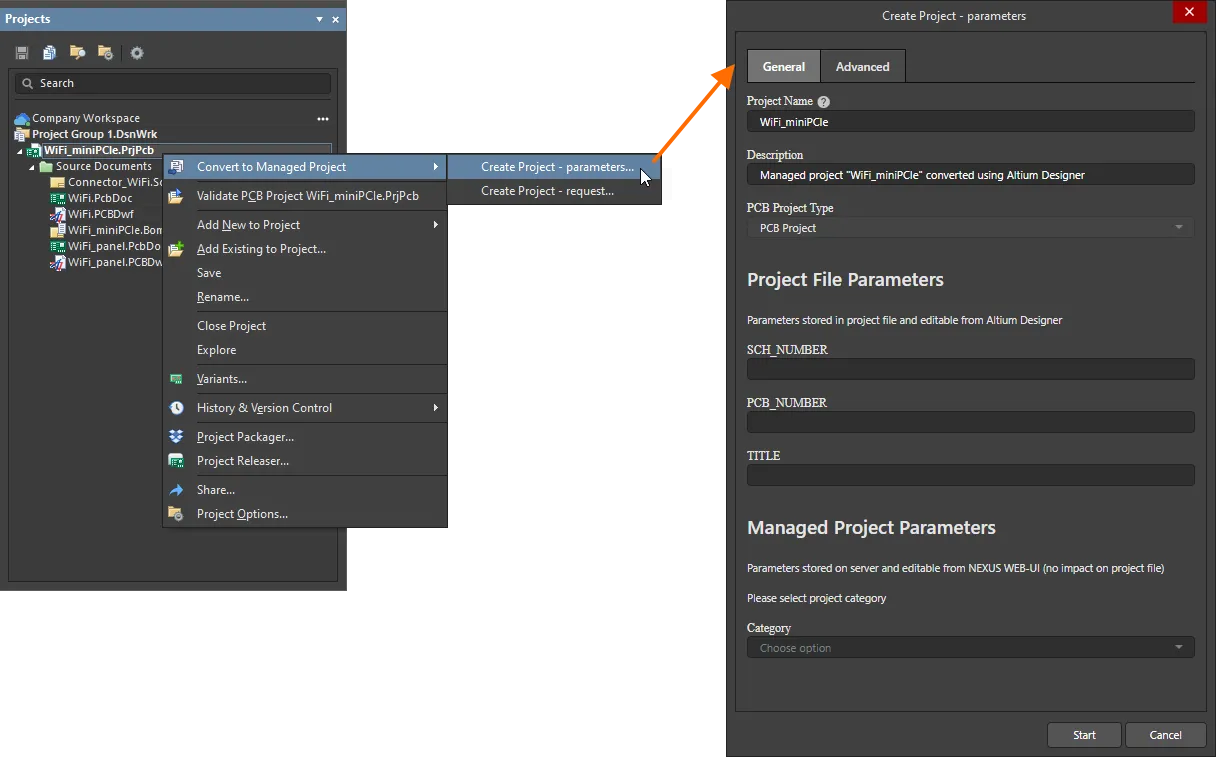
When the connected Workspace includes activated process definitions that are part of the Project Creations theme, the indexed commands can be accessed by right-clicking on a local project in the Projects panel and selecting the desired process from the Convert to Managed Project sub-menu.
If no active process definitions are available for the Project Creations process theme – in your active Workspace – the sub-menu will not be visible.
After launching the command, the Create Project dialog (actually named after the chosen process) opens. Use the General tab of the dialog to describe the project and specify the type of project and template, if desired. On the Advanced tab, you can specify the location of the project and choose the repository, and repository and Workspace folders. Once ready, click Start to create the new Workspace project in accordance with the underlying workflow for that process.

Process-based Project Copying
When the connected Workspace includes activated process definitions that are part of the Project Creations theme, the indexed commands can be accessed by right-clicking on a Workspace project in the Projects panel and selecting the desired process from the Make a copy of the managed project sub-menu.
If no active process definitions are available for the Project Creations process theme – in your active Workspace – the sub-menu will not be visible.
After launching the command, the Create Project dialog (actually named after the chosen process) opens. Use the General tab of the dialog to describe the project and specify the type of project and template, if desired. On the Advanced tab, you can specify the location of the project and choose the repository, and repository and Workspace folders. Once ready, click Start to create the new Workspace project in accordance with the underlying workflow for that process.
