Applied Parameters: ContextObject=Room|Mode=SmartCut_Rooms
Summary
This command is used to slice the room under the cursor into two or more separate rooms. Each new room created may inherit one or more of the components contained in the original room. Where such components belong to a component class, a new class will be created for each new room and membership will be updated accordingly.
Access
This command is accessed from the PCB Editor by right-clicking over a placed room then choosing the Room Actions » Slice and Create Classes command from the context menu.
Use
First, ensure that the cursor is positioned over the room that you wish to slice.
After launching the command, you will enter smart slice mode (which is essentially line placement mode). To slice the room:
- Starting outside the boundary of the room, click or press Enter to anchor the starting point for the slicing line (the first track segment).
- Move the cursor to define the track segment then click or press Enter to anchor the end point for this first segment, which is also the start point for the next connected segment.
- Continue to position the cursor then click or press Enter to anchor a series of vertex points that define the series of connected track segments.
- Once the slicing line has been placed across and out the other side of the room, right-click or place Esc to terminate line placement.
- Repeat steps 1-4 to slice the room further, as required.
- When you have finished all required slicing, right-click or press Esc to terminate slicing - a Confirm dialog will appear asking if you wish to split one room into x rooms. Click Yes to effect the split(s) - the rooms will be graphically redrawn with a corresponding Room Definition Rule associated with any new room, and an Online DRC performed automatically if needed. If the members of the original room were part of a component class and slicing results in members residing in the newly-generated rooms, each new room will have a component class created and associated with it. The component class membership will be updated accordingly so that each component in a new room will be added to the class for that room and removed from the original room class. Any room that is created that does not inherit a member component of the original room will have no component class created and assigned to it.
Placement Modes
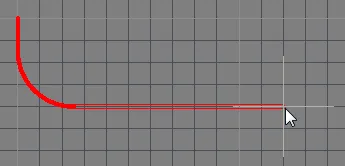
While placing track segments there are five available corner modes, four of which also have corner direction sub-modes. During placement:
- Press Shift+Spacebar to cycle through the five available corner modes: 45 degrees, 45 degrees with arc, 90 degrees, 90 degrees with arc, and Any Angle.
- Press Spacebar to toggle between the two corner direction sub-modes.
- When in either of the arc corner modes, hold the
 or
or  keys to shrink or grow the arc. Hold the Shift key as you press to accelerate arc resizing.
- Press the 1 shortcut key to toggle between placing one segment per click (the first five images below), or two segments per click (the last image in the set below). In the first mode, the hollow track segment is referred to as the look-ahead segment.
- Press the Backspace key to remove the last vertex.


 Press Shift+Spacebar to cycle through the five available corner modes, press Spacebar to toggle the corner direction, press the 1 shortcut to
toggle placement between one segment or two segments.
