Releasing Your Design Locally from Altium Designer
Parent page: Board Design Release
As well as the managed (Online) release mode, the Project Releaser also caters for local, unmanaged (Offline) release. Typically, this mode of releasing would be used if you don't use a Workspace, or if you cannot be currently connected to your Workspace. And while the Project Releaser will automatically determine the mode where possible, or offer options where that is not so clear cut, you can always force the use of Offline mode. The latter is performed by setting the Release Target, on the Release Options tab of the Project Release Options dialog (click the button, while at Stage 1 of the release process), to one of the following:
Unmanaged - Folder
: set this option to release generated data to a local folder. The root folder path is specified on the Output Path tab of the dialog. By default, this is set to[OutputPath]
(using the path defined in the Output Path field, on the Options tab of the Project Options dialog).Unmanaged - Zip
: set this option to release generated data to a local folder. The data will be packed into a single Zip file. The Zip path/name is specified on the Output Path tab of the dialog. By default, this is set to[OutputPath][ProjectName].zip
(using the path defined in the Output Path field, on the Options tab of the Project Options dialog).
You can quickly tell if the Project Releaser is configured in its Offline mode, by:
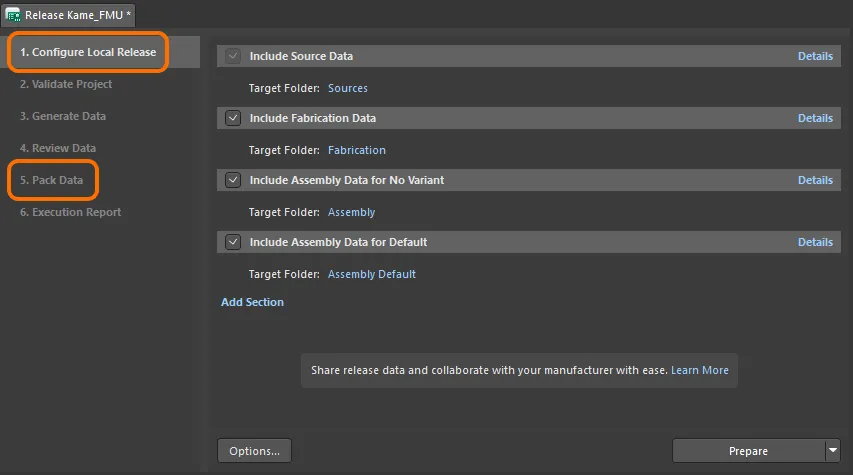
- The title of Stage 1 reading
Configure Local Release
, instead ofConfigure Server Release
(when in Online mode). - The title of Stage 5 reading
Pack Data
, instead ofUpload Data
(when in Online mode).
The release process is very similar to that described for the managed (Online) release mode, just targeting release of data to local folders instead. Rather than repeating the information described earlier, here we'll just outline the stages involved, and highlight any differences.
Offline Stage 1 – Configure Local Release
Here is where you configure the data that you want to be generated from your design project. Source data is always included as part of a release, with the option to include fabrication, assembly (base and/or variations), and any custom data, as required.
For each data set to be generated, you need to specify a target folder where that data will be stored. Default folder names are used as follows:
- Source Data – will be generated in the
Sources
folder. - Fabrication Data – will be generated in the
Fabrication
folder. - Assembly Data for no variant – will be generated in the
Assembly
folder. - Assembly Data for <VariantName> – will be generated in the
Assembly <VariantName>
folder. - Custom Data <Custom - n> – will be generated in the
<Custom - n>
folder.
You can of course change this default naming to suit your requirements. To do so, click on a current Target Folder entry, enter the desired new name for the folder, and press Enter.
With the data sets to be created as part of the release configured as required, click the button at the bottom-right of the view to proceed.
Several pre-release checks are now performed, including:
- Making sure that the project and all files have been saved.
- Making sure that the project and all relevant file(s) are committed to VCS if applicable.
- Making sure that each enabled data item has been given a target folder.
If any issues are found, you will be offered solutions with which to resolve them (such as saving locally modified files and committing to VCS).
The Source Data
is generated at this stage – with a snapshot of the source design project files released to the target folder.
Offline Stage 2 – Validate Project
After Stage 1 completes without issue, this next stage of the release process is run automatically when one or more Validation-type reports are detected in assigned OutJob file(s). All defined validation output generators, defined in an Output Job file assigned to the data item being released, are run. This stage runs the same as it does when releasing in managed (Online) mode.
Offline Stage 3 – Generate Data
After Stage 2 completes without issue, this next stage of the release process is run automatically. This is where all other outputs – defined in the OutJob file(s) assigned to the included Data Items – are run, to generate the data to be released into the relevant target folders. This stage runs the same as it does when releasing in managed (Online) mode.
Offline Stage 4 – Review Data
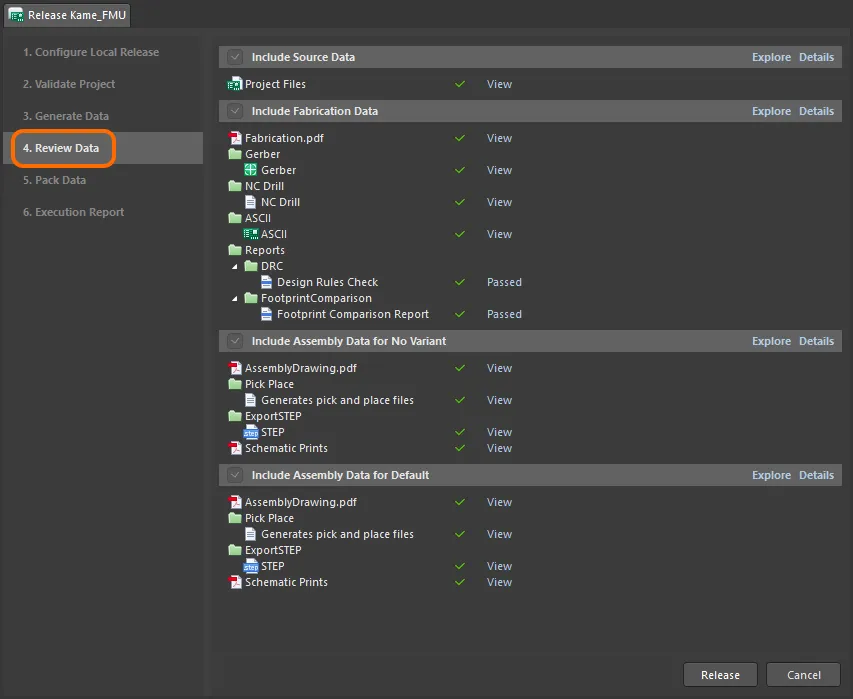
With all validation checks passed, and output data generated, this stage of the release process allows you to review the generated data. This stage behaves in much the same way as when releasing in managed (Online) mode.
In the compact view of the generated data, click a View link to open the associated data file, or file set, either within the relevant editor within Altium Designer (e.g. the CAM editor) or within the relevant external application (e.g. Microsoft Excel). In the detailed view, double-click on an entry to view just that file.
If, after reviewing the data, you find you need to make modifications, click the button at the bottom-right of the view. A confirmation dialog will appear, alerting you to the fact that all generated data will be lost – clicking OK will cancel the release and you will be returned to Stage 1 of the process.
If the generated data all looks good, proceed with the release by clicking the button (also at the bottom-right of the view). What happens next depends on the target release option you are using:
Unmanaged - Folder
: the generated files will be released to the target folder(s) and the process will jump directly to the last stage, to view the Execution Report.Unmanaged - Zip
: the process will proceed to the next stage – Pack Data.
Offline Stage 5 – Pack Data
After confirming the release in the previous stage, this next stage is automatically entered and involves the data being packed into a single, localized zip file. The Zip path/name is specified on the Output Path tab of the Project Release Options dialog. By default, this is set to [OutputPath][ProjectName].zip
(using the path defined in the Output Path field, on the Options tab of the Project Options dialog).
Offline Stage 6 – Execution Report
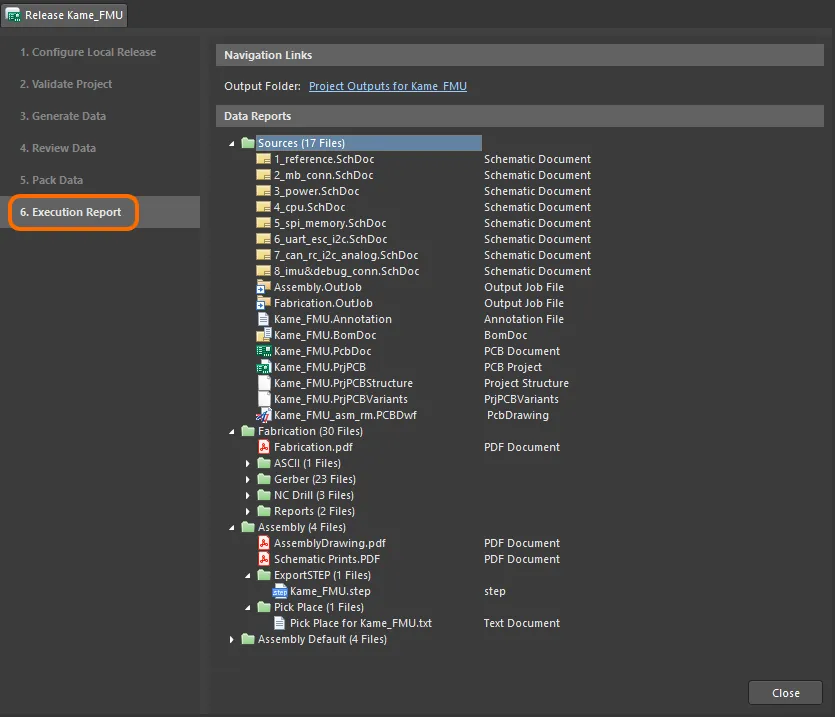
This is the final stage of the process, providing a summary of the release.
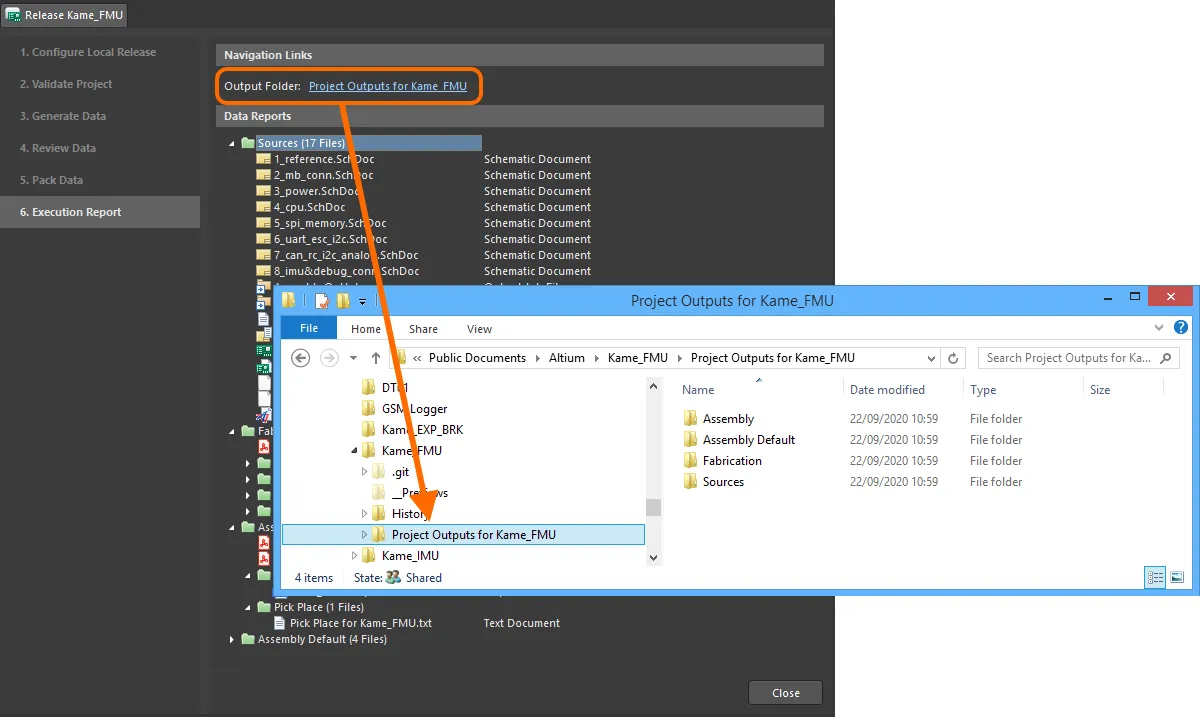
Use the Navigation Link provided to quickly explore (in Windows File Explorer) to the output folder, or packed zip file, respectively.