KB: Rename Output Items for a Renamed Managed Project
Solution Details
Renaming and publishing a project has more procedures than simply changing the project name. Users may ensure that their project is correctly renamed and released by carefully following the steps for renaming, saving to the server, and updating each item inside the Project Releaser.
This article aims to clarify the process for correctly updating a project's name and ensuring the change is consistently reflected throughout the project's entire release.
Solution to Renaming a Project and Its Release
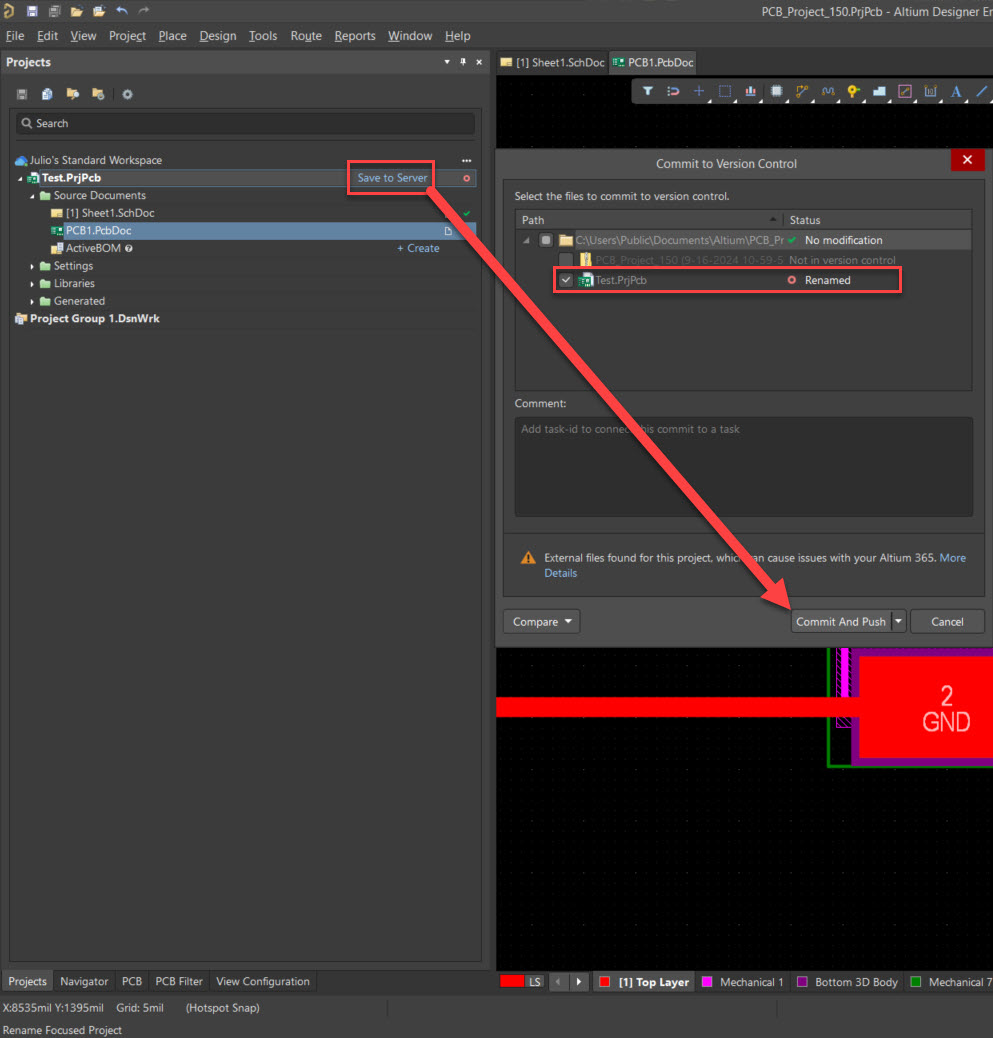
Step 1: Renaming the Project
- Locate the project.
- Right-click on the project name and select the option to rename it.
- Enter the new project name and confirm the change.
Step 2: Saving Changes to the Server
After renaming the project, save the changes by committing and pushing the project to the server. This step ensures that the new project name is updated in the project repository.

Step 3: Initiating the Project Releaser
- Right-click on the project name again in the project panel.
- Select the Project Releaser to begin the process of releasing the project under its new name.

Step 4: Updating Release Items
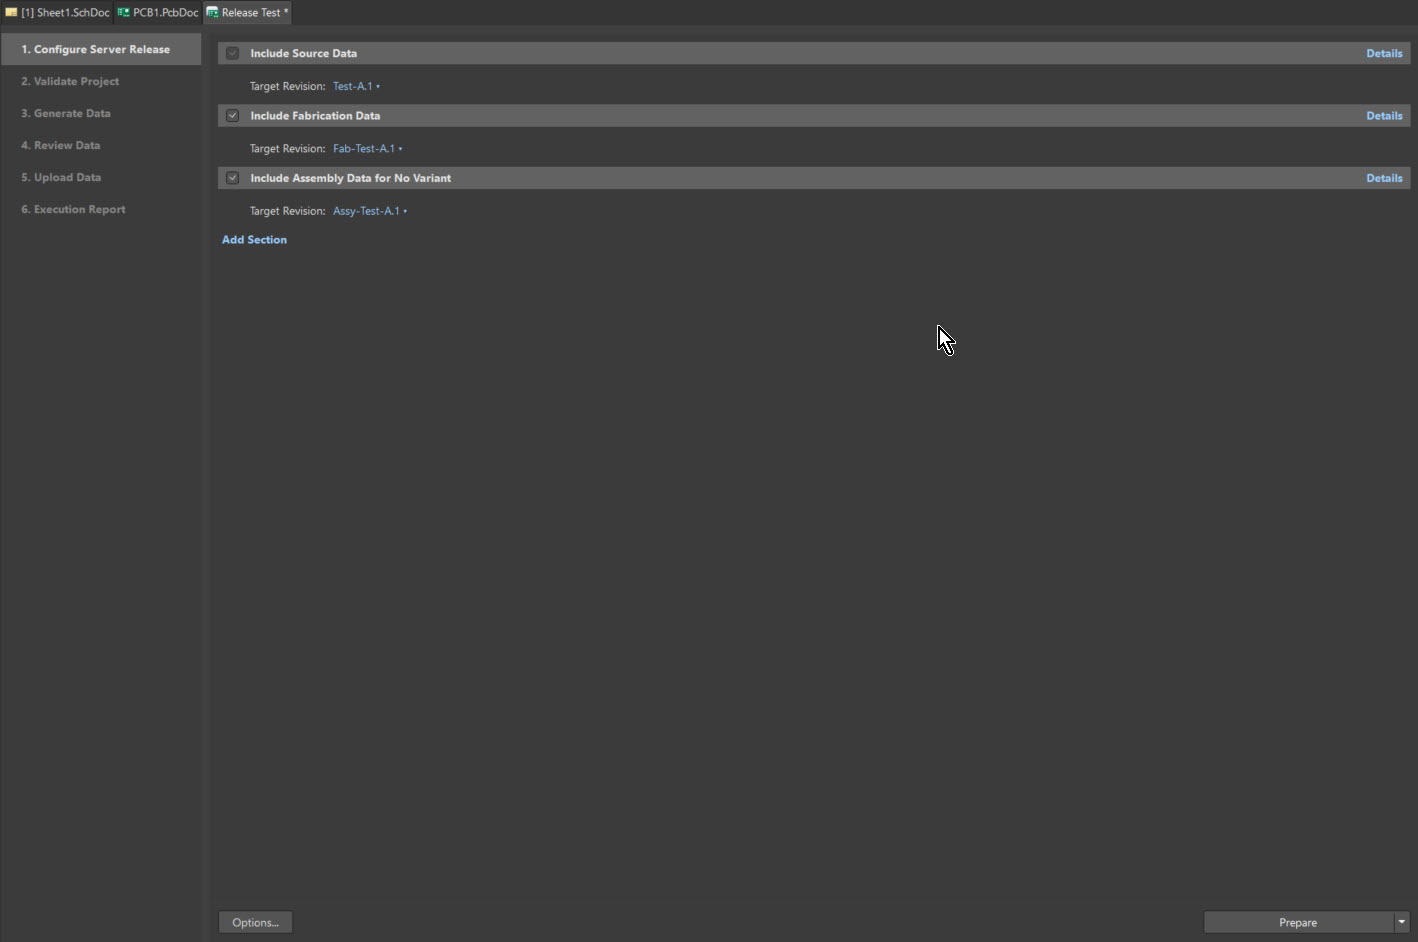
- Within the Project Releaser, start with the Source Data.
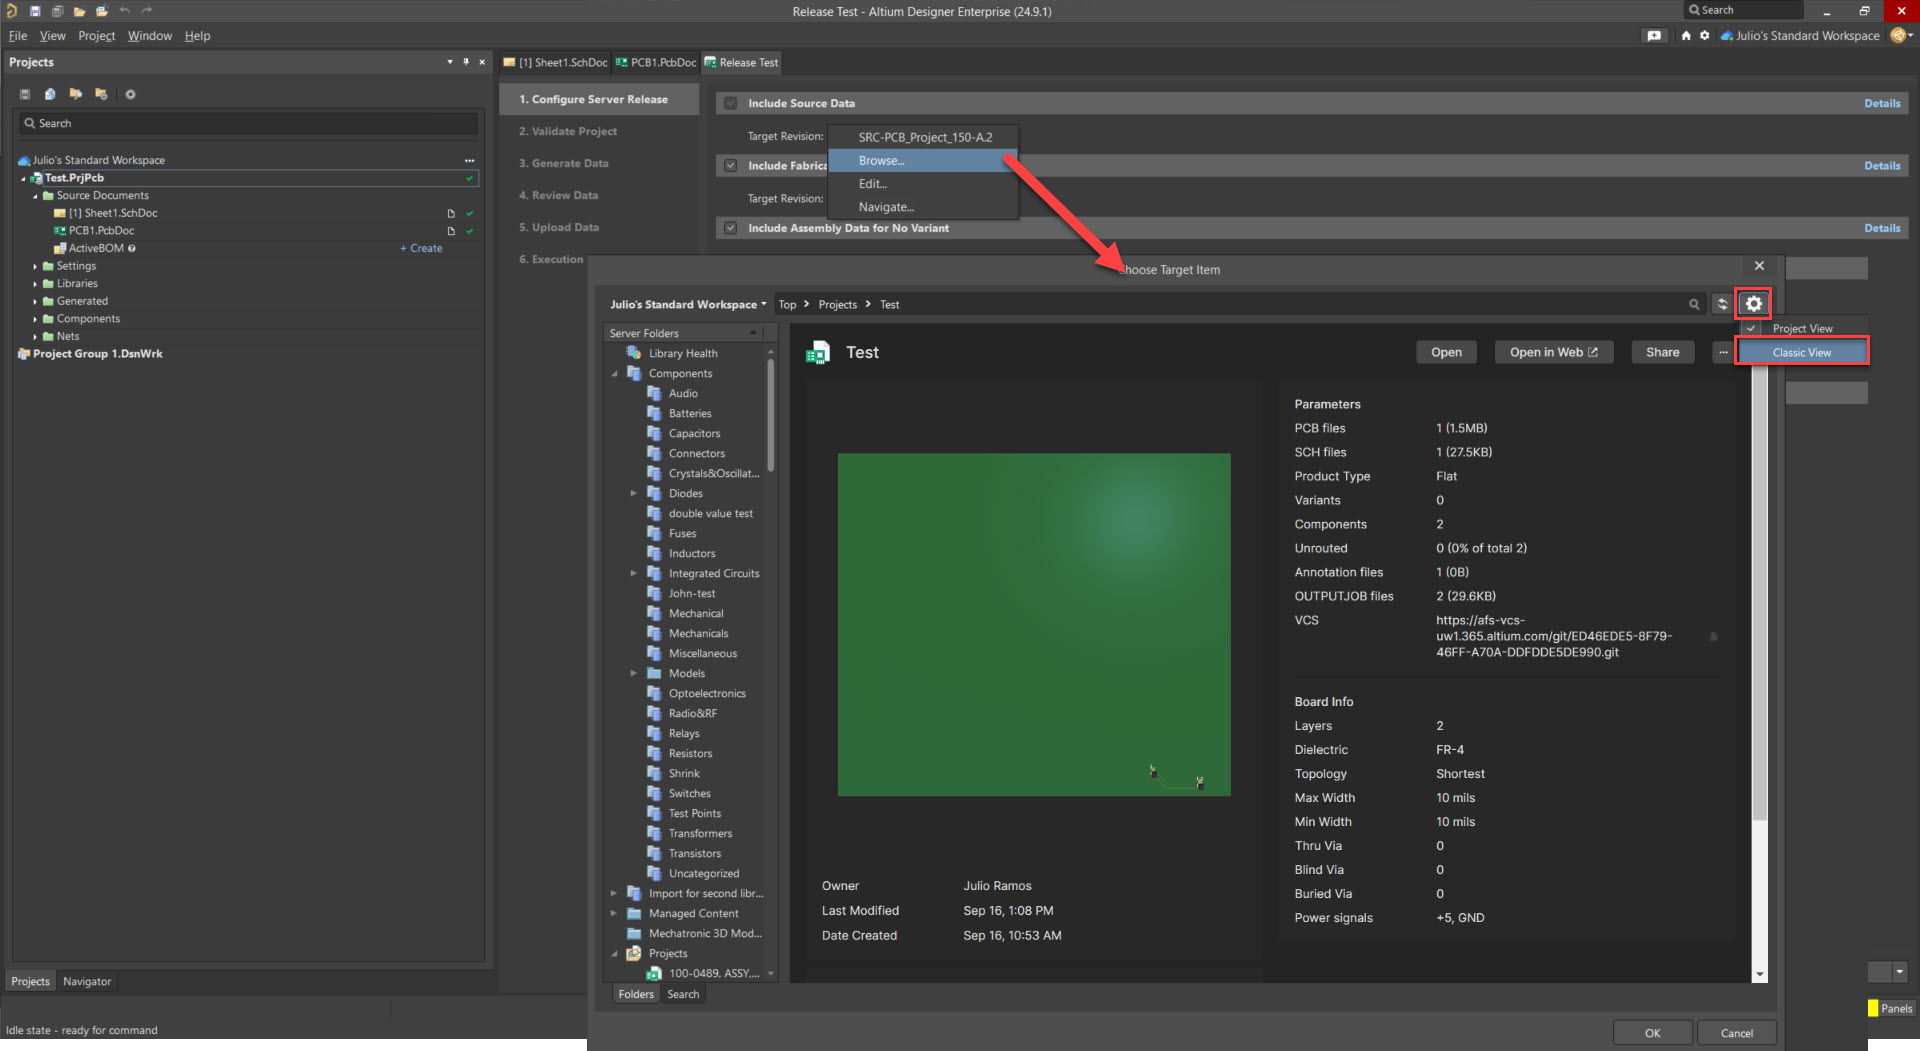
- Click on the release revision and then select the "Browse..." option. This action will open a window with the item highlighted. 
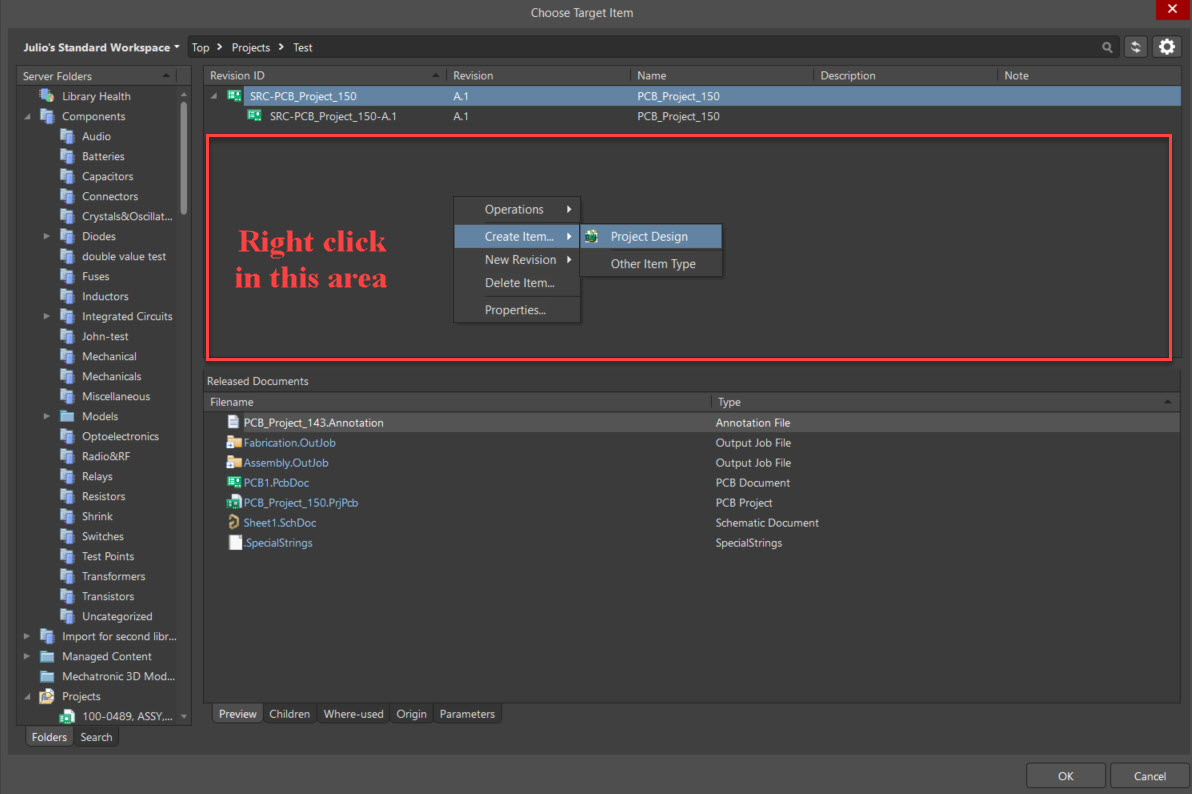
- Right-click in this area or on this item in, select "Create Item," and then choose the appropriate item type
.
Note: sometimes the explorer panel can open in "Projects View", and needs to be changed to "Classic View" to be able to "Create Item".
- In the dialog that appears, define the new Name (using the same name as the newly renamed project) and Item ID.
- Click "OK" to close the Explorer window.
Step 5: Repeating the Process for Other Items
- Repeat step 4 to for every item associated with the project that needs the name change. This includes, but is not limited to, Fabrication and Assembly items.
- It's crucial to ensure that all items reflect the new project name to maintain consistency and avoid any confusion
.
Step 6: Releasing the Project with the New Name
- Once all items have been updated with the new project name, proceed to release the project.
- The project should now be released under its new name, with all associated items correctly reflecting this change.
Here is a short video highlighting the aforementioned steps;
