Once the Multi-board Assembly is complete, a manufacturing drawing can be created and annotated as required. A manufacturing drawing for a multi-board design is being created in the Draftsman editor.
Setting Up a Manufacturing Drawing Document
To create a manufacturing drawing for the multi-board design, a new Draftsman document (*.MbDwf) should be added to the multi-board project. To do this, right-click the project entry in the Projects panel and then select Add New to Project » Draftsman Document from the context menu (or use the File » New » Draftsman Document command from the main menus). In the New Document dialog that opens, select an available manufacturing drawing template as required and ensure that a correct Project and multi-board assembly Document is selected.
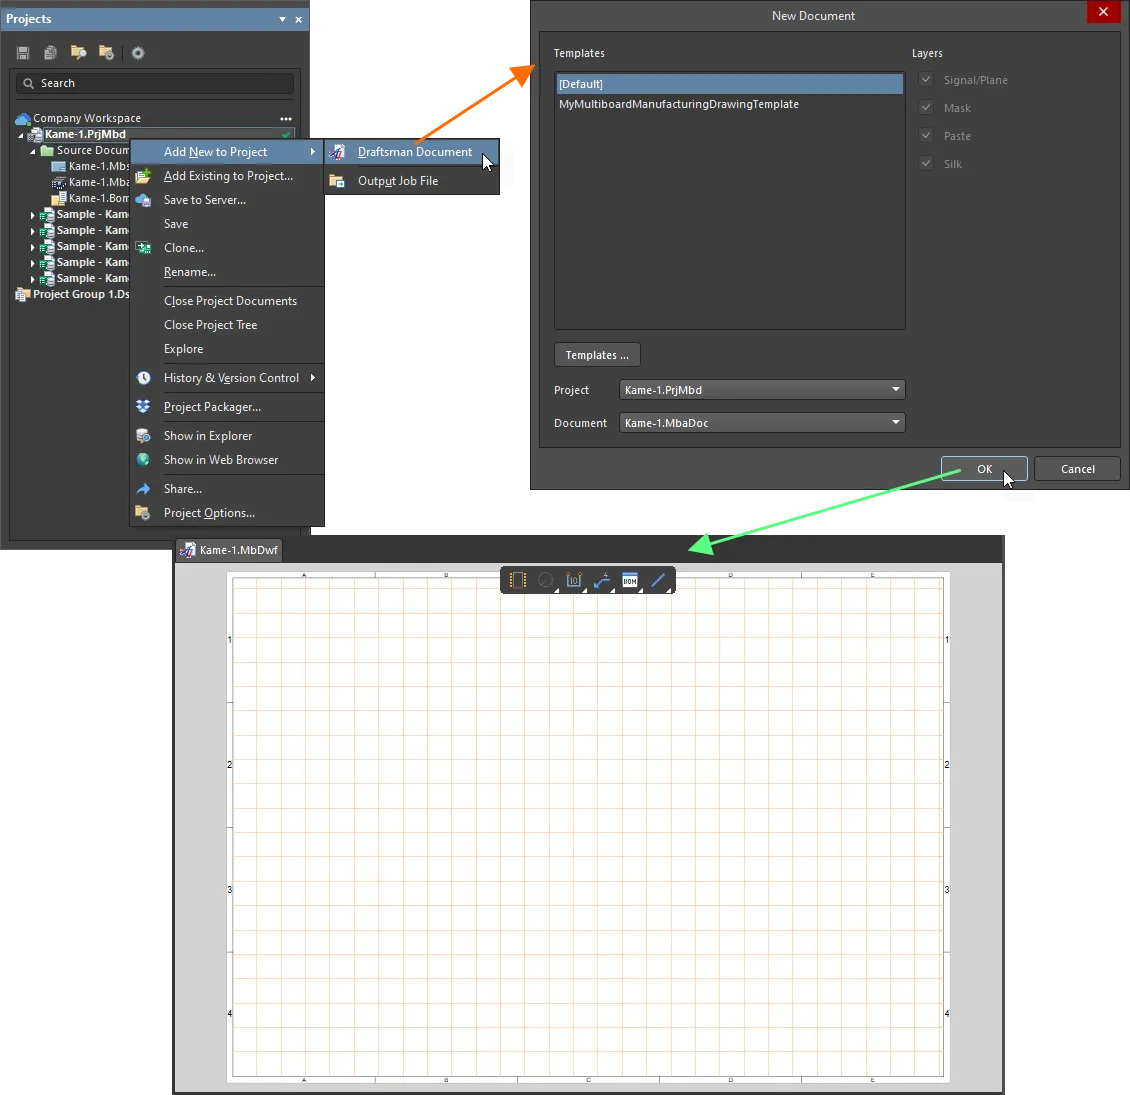
Add a new Draftsman document to a multi-board project using the Projects panel and the New Document dialog.
Creating a Manufacturing Drawing Template
A manufacturing drawing template defines a manufacturing drawing document's content and (optionally) its style properties.
To create a new manufacturing drawing document template:
-
When a Multi-board design project is the active project, create a new manufacturing drawing document by selecting the File » New » Draftsman Document command from the main menus.
-
Define the content of the template. The template supports multi-page documents, data for the main document attributes (tables and lists, drawing types, etc.), page settings and elements that do not depend on the Multi-board design content. A sheet template can be used to define the graphic format of a new or existing drawing document and is also saved as part of a manufacturing drawing document template.
A multi-page manufacturing drawing document might typically contain multi-board views and BOM tables. When saved as a Draftsman multi-board document template, the data from the current Multi-board design is retained to define a drawing content 'shell.'
-
Select the File » Save Copy As or File » Save As command from the main menus. In the Save dialog that appears, browse to the local templates folder for your installation of Altium Designer (defined in the Local Templates folder field at the bottom of the Data Management – Templates page of the Preferences dialog; C:\Users\Public\Documents\Altium\AD<Version>\Templates for the default installation), enter the desired name of the template and select Altium Draftsman MultiBoard Document Templates (*.MbDot) from the Save as type drop-down.

After clicking Save, an existing drawing document's content and attributes, except those related to data extracted from the Multi-board design, will be saved as a manufacturing drawing document template. If the source drawing document has a specific page style (as might be applied by a Sheet Template), these graphical elements and attributes will be saved with the new manufacturing drawing document template.
-
As with other Altium Designer documents, the Save As command will replace the existing source file in the project structure (in this case, a Draftsman drawing document) with the newly saved file (a Draftsman template document). The source document (
*.MbDwf) is not deleted from the project folder on disk. A better approach is to use the Save Copy As option, which will save the new template to the nominated directory while keeping the source document (and project contents) intact.
-
Any elements that are incompatible with the manufacturing drawing document template format will be removed.
When subsequently used as a template for a new manufacturing drawing document, the project data is loaded into the shell in place of the template data, therefore, recreating the document format and its type of content.
Options of a manufacturing drawing document can be configured in the Properties panel in its Document Options mode, which is active when no object is selected in the document's design space. Refer to the Setting Up a Draftsman Document page to learn more.
-
Once the manufacturing drawing document has been created, any changes made in the multi-board assembly can be imported into the manufacturing drawing using the Tools » Import Changes From <MultiBoardAssembly.MbaDoc> command from the main menus or the right-click menu of the design space.
-
Default properties of manufacturing drawing objects can be configured on the Draftsman – Defaults page of the Preferences dialog. These properties will be applied when placing subsequent objects.
-
The Bookmarks panel offers a convenient way to navigate and manage a multi-sheet manufacturing drawing. The panel presents an expandable tree view of the complete document structure and includes all document sheets and the primary view objects within those sheets.
Working with Views
In a manufacturing drawing document, you can place views of the multi-board assembly included in this project.
Multi-board View
A multi-board view is an automated graphic composite of the outlines of PCBs and 3D models constituting the multi-board assembly (*.MbaDoc).
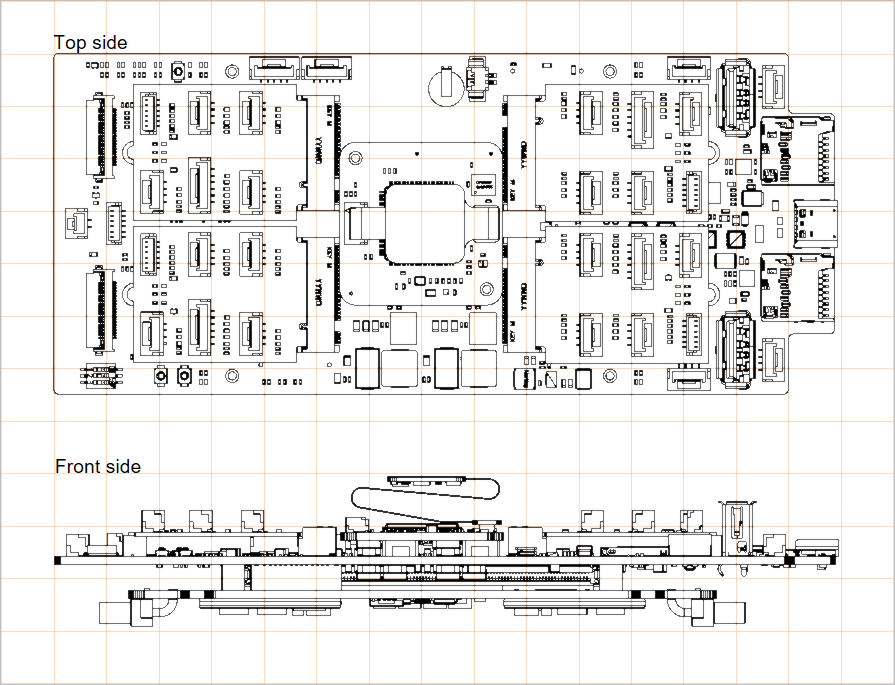
Two placed multi-board views showing the multi-board assembly from the top and front sides.
A multi-board view is placed in a manufacturing drawing document by clicking the  button in the Active Bar or selecting the Place » Multiboard View command from the main menus.
The properties of a placed multi-board view can be configured in the Properties panel when the view is selected in the design space. Click the Parts button in the Properties region of the panel to open the Parts dialog, from where you can manage the visibility of parts (PCBs and STEP models) constituting the assembly on the selected multi-board view.
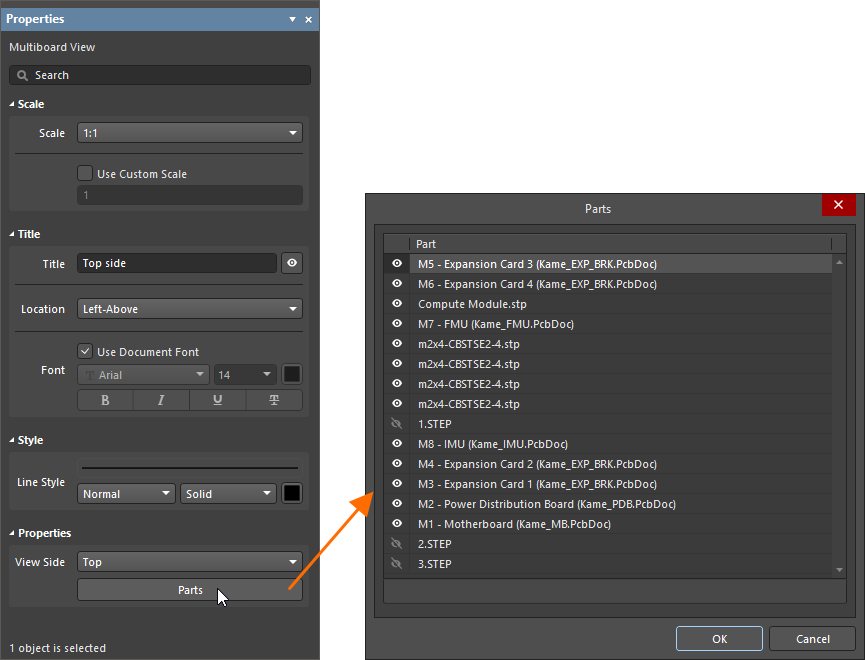
The Properties panel when a placed multi-board view is selected. Use the Parts dialog to manage the visibility of the assembly's parts on the view.
Section View
A section view provides a profile slice, or sectional drawing taken from a nominated 'cut' point through a placed multi-board view. The section view generator takes the available 3D data from the current multi-board assembly to create a standalone section drawing aligned to the nominated cut point. Any number of section views can be created from a multi-board view.
Note that section views can only be created from a multi-board view whose View Side property is set to Top or Bottom.
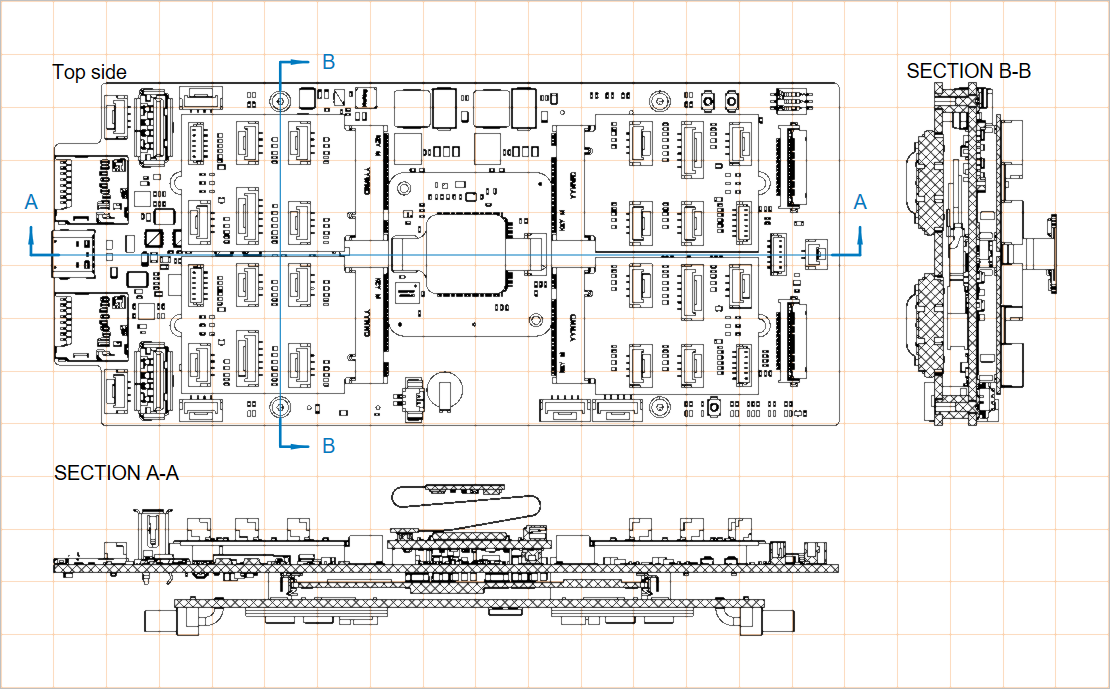
Two placed section views created from the same multi-board view
A section view is placed in a manufacturing drawing document as follows:
-
Select the Place » Additional Views » Section View command from the main menus.
-
Position the cursor on the multi-board view, where a vertical cut line (initially
A-A) will follow the cursor movement – use the Spacebar to toggle between vertical and horizontal cut lines.
-
Click to set the position of the cut line.
-
Move the cursor on either side of the line to set the view direction (as indicated by the cut line arrows) and click to confirm.
-
Drag and place the new section view in the desired location.
The properties of a placed section view, including its drawing representation style, view direction and labeling, can be configured in the Properties panel when the view is selected in the design space.
If you create multiple section views in your manufacturing drawing, it is a good idea to give them each a unique Label.

The Properties panel when a placed section view is selected
Board Detail View
A board detail view is a floating, magnified view of a multi-board view's defined area.
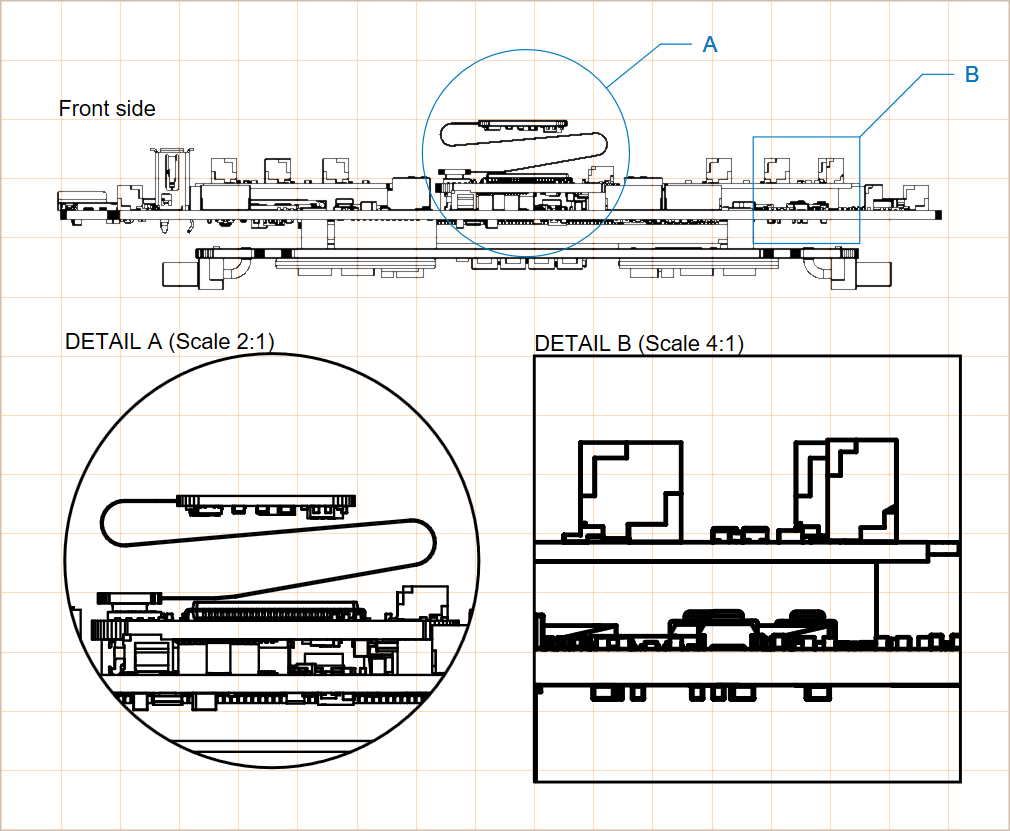
Two placed board detail views (with circle and rectangular areas) created from the same multi-board view
A board detail view is placed in a manufacturing drawing document as follows:
-
Select an option from the
 button menu on the Active Bar or via the Place » Additional Views » Board Detail View menu options. Two options are available for the board detail view area: Circle area detail view and Rectangle area detail view.
-
Click at a point on a multi-board view to specify the center of the target board detail view area.
-
Move the mouse, then click to specify the radius of the view area (the board detail view source). The board detailed view will appear floating on the cursor.
-
Click again to set the position of the board detail view expansion.
The properties of a placed board detail view, including its magnification factor (scale), labeling and line attributes, can be configured in the Properties panel when the view is selected in the design space.
If you create multiple board detail views in your manufacturing drawing, it is a good idea to give them each a unique Label.
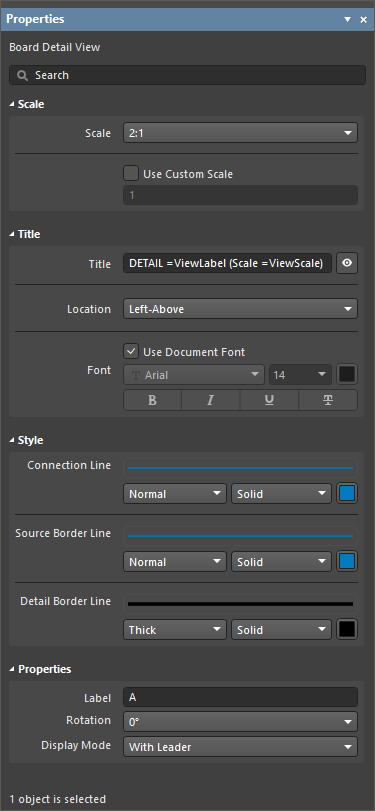
The Properties panel when a placed board detail view is selected
Board Realistic View
A board realistic view is a scalable 3D rendering of the current multi-board assembly.
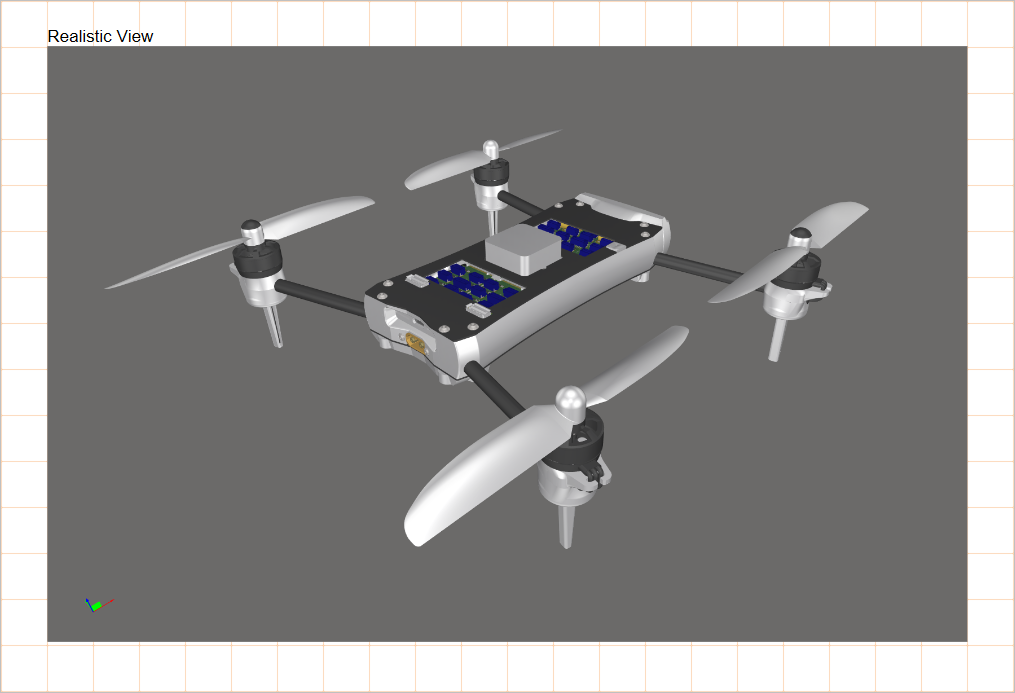
A placed board realistic view
A board realistic view is placed in a manufacturing drawing document by selecting the Place » Additional Views » Board Realistic View command from the main menus. The view will initially adopt the Multi-board Assembly editor’s current 3D view.
The properties of a placed board realistic view can be configured in the Properties panel when the view is selected in the design space. When the 3D view of the assembly is changed in the Multi-board Assembly editor, click the Take Current View Configuration button in the Properties region to adopt the current 3D view.
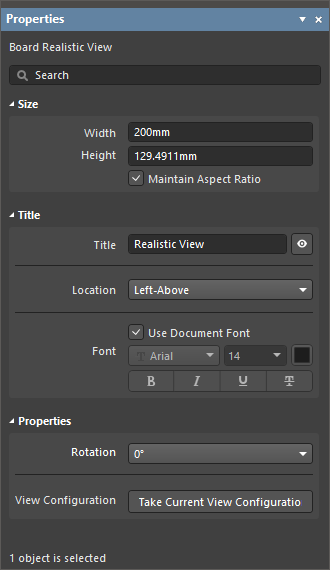
The Properties panel when a placed board realistic view is selected
Drawing Annotation and Dimensioning
A range of additional annotation, dimensioning and drawing tools are provided to add important information to a manufacturing drawing. These include automated note and highlighting systems, as well as tools to indicate the lengths, sizes, and angles of the object outlines, or the distance between nominated objects. BOM and generic tables are also available.

Refer to the following pages to learn more: