Chinese - Translation is available for Altium Designer 24:
Go to the pageInstallation of Altium Designer is both intuitive and fast, courtesy of the Altium Designer Installer. This wizard-based installer streamlines the initial installation process while letting you choose the initial 'flavor' of the installation, in terms of installed functionality.
This page takes a look at the procedure for installing Altium Designer on a computer.
Obtaining the Installer
To access the Altium Designer Installer (commonly referred to as the Online Installer), you need first to download and run an executable – AltiumDesignerSetup_<Version>.exe. This executable is downloaded from the Altium Designer section of the Altium Downloads page and can be saved anywhere on your hard disk.
Each version of Altium Designer has its own dedicated installer. If you have an existing installation of Altium Designer, you can either update it to a new version or install that new version as a fresh and distinct instance. The installation system supports the concurrent installation of different instances of the software. The beauty of installing different version instances is that it enables you to quickly access a previous version directly and independently, whereas an update effectively replaces the earlier version with the later one.
Obtaining the Offline Installation Package
The standard Altium Designer Installer requires an internet connection to complete the installation process. If it is not possible to run the installer from the target PC, you can install Altium Designer using an offline installation package (commonly referred to as the Offline Installer).
First, you will need to obtain the offline installation package. This is a zipped collection of the necessary installables (including extensions), along with the relevant Altium Designer Installer. The latter simply runs, as per the standard internet-based Installer, only getting the required files from elsewhere in the local unzipped content rather than the Altium Cloud repository.
The Offline Installer can be obtained directly from the Altium Designer section of the Altium Downloads page by clicking the Need Offline Installer? link.
You must be signed in to your Altium Account to see the link.
Follow the prompts to send a request. Once your request is confirmed, go back to the Downloads page – the link will have been replaced with a ZIP file download link. You may need to sign out of your Altium Account and then sign back in again for the link to change from a question into a download link.
-
Once the initial request has been approved, you will always be able to have access to the corresponding Offline Installer for each existing version of the software, as well as new versions as they are released. Just select the version of Altium Designer required, and the link will update accordingly.
-
Each version of the software has its own dedicated installer and, therefore, requires a dedicated offline installation package.
With the Offline Installer acquired, unzip to the required target PC on which you want to install the software.
If you are using an Offline Installer, you might wish to configure the installed instances of Altium Designer to operate in an offline mode, essentially severing the connection to Altium. This can be done from the System – Account Management page of the Preferences dialog by choosing the No, I wish to remain disconnected from Altium option ( ). By enabling this option, your installation of Altium Designer will stay completely disconnected from Altium. While disconnected, you will not be able to access or use any of the on-demand services that require a connection with Altium. In essence, this option is a 'full offline' switch.
In addition, confirmation that you are using an offline installation of the software can be seen on the System – Installation page of the Preferences dialog. The Offline installation option will be enabled with the path to the unzipped offline installation package folder ( ).
).
Note that the offline installation does not check for updates or new extensions, regardless of the status of the Altium Connection setting. To perform an update, you will need a later copy of the Offline Installation package.
When disconnected from Altium, your offline installation can be licensed using the Private License Service available as part of an Altium On-Prem Enterprise Server or Altium Infrastructure Server or using a Standalone license file.
Running the Installer
-
When using an Online Installer – double-click the AltiumDesignerSetup_<Version>.exe file.
-
When using an Offline Installer – browse to the location on your hard disk into which you have unzipped the offline installation package and double-click the Installer.exe file.
The Altium Designer Installer welcome page will open.
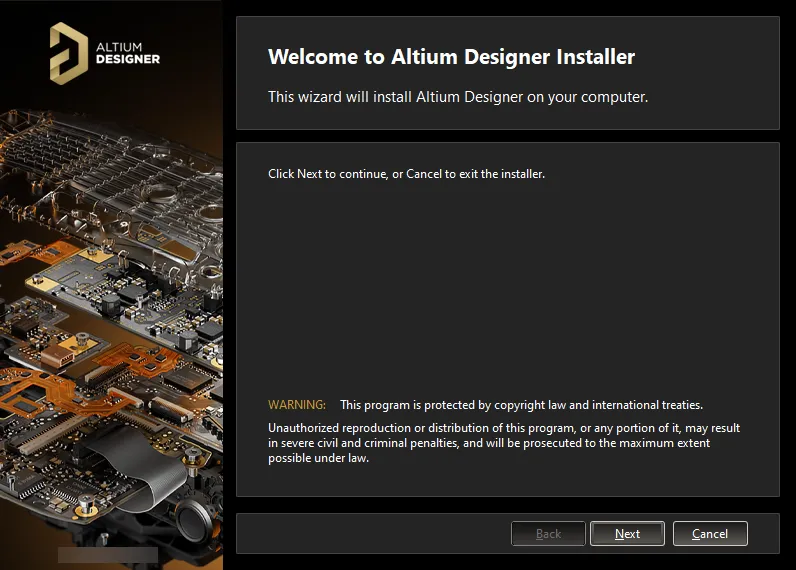
Initial welcome page for the Altium Designer Installer.
The installer itself is wizard-based, providing a set of progressive (and intuitive) pages that collectively gather the information to effectively install the version of the software and its initial feature set as you require.
Click  to continue. The following sections provide a summary of the various pages you will encounter.
License Agreement
This page of the Installer presents you with the Altium End-User License Agreement (EULA).
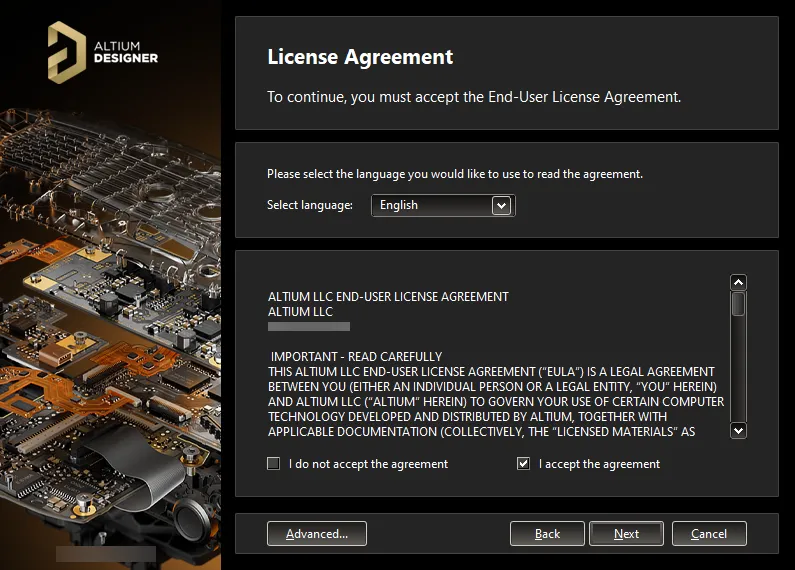
Read and accept Altium's End-User License Agreement.
Before you can continue with the installation of the software, you must read through and accept the terms of this agreement. The agreement can be viewed in different languages, including English (the default), German, French, Chinese, Japanese, Italian, Spanish, and Korean.
Clicking the  button will open an Advanced Settings pop-up window. From here, you are able to specify proxy settings, if applicable. Use the Unified Sign In (Beta) option to choose whether to use a unified sign in process via an external browser on the Sign In stage of installation. Click
  to effect any changes and return to the License Agreement page.
These settings are only needed for the Online Installer if applicable for that installation environment. They can be ignored as part of the offline installation.
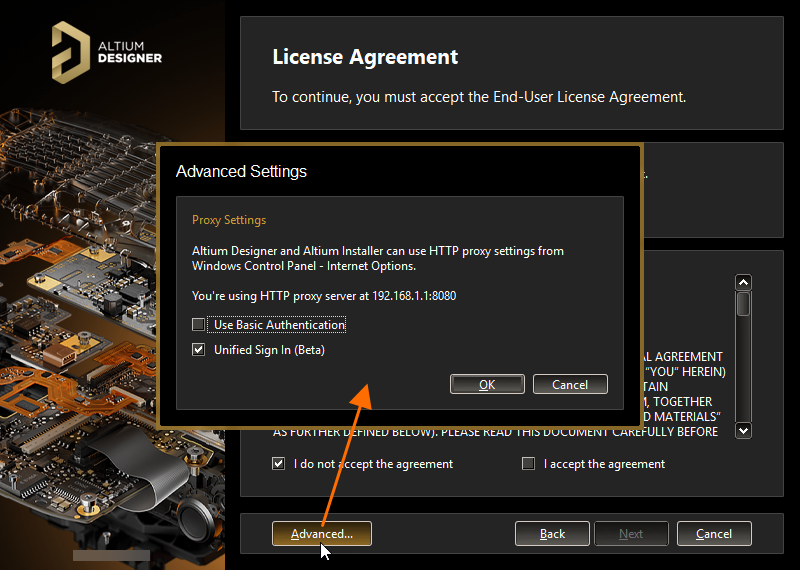
Specify the use of basic authentication using proxy settings and unified sign in as part of advanced options for the installation.
After reading the EULA, continue with the installation by checking the I accept the agreement box and clicking the  button.
Sign In
This stage is only applicable when using an Online Installer.
You will now be presented with the Sign In pop-up window. Use it to sign in to your Altium Account to which your valid license is associated. The reason for this is two-fold:
-
First, it verifies your identity and that the installation of the software is valid as determined by your Altium Account and licensing.
-
Second, it provides secure access to the Altium Cloud Repository in which the installation files reside – the files that are required to be downloaded before the software can be ultimately installed on the PC.
Signing in is performed using your browser. Clicking the  button will open your default browser with a page from which you can sign in to your Altium Account using your preferred (and accessible) method. Once signed in, the next page of the Installer will automatically open.
For security, there is a time limit (5 minutes) to complete the sign-in process. An error will occur if this time has elapsed, in which case you will need to start the sign-in process again.
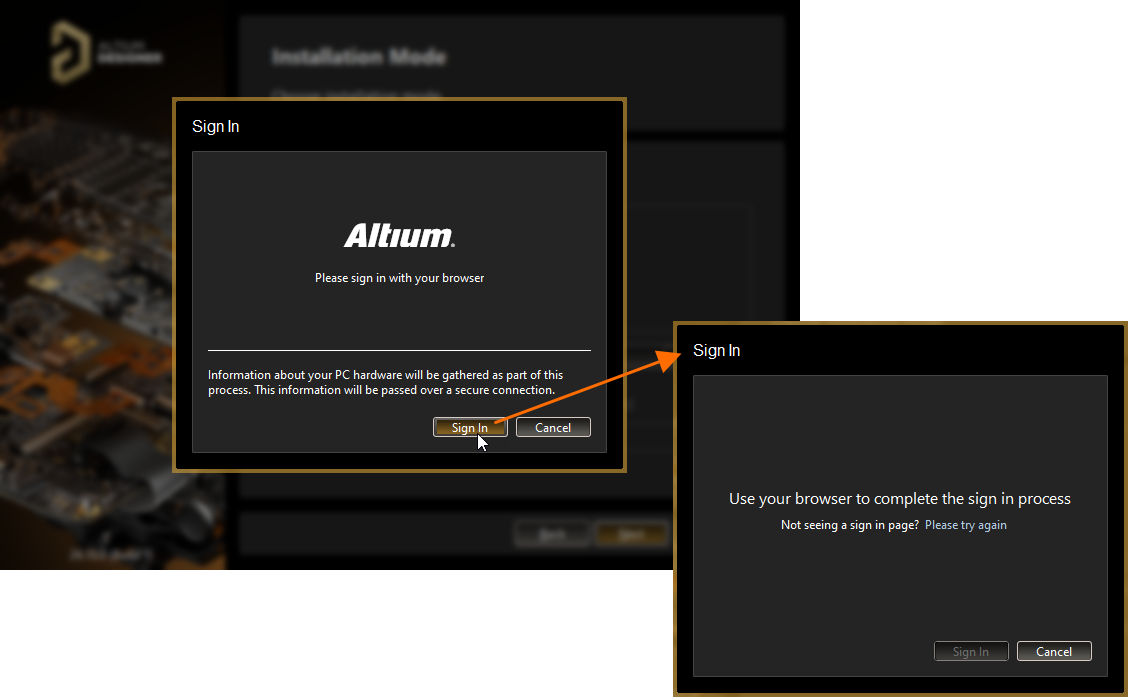
Log in to your Altium Account using a unified sign in process.
If you previously opted not to use unified sign in in the Advanced Settings pop-up window, the Account Log In window will appear. Use it to sign in to your Altium Account using your Altium Account credentials, linked Google® or Facebook® account, or your organization's Single Sing-On (SSO) authentication system.

Log in to your Altium Account using credentials, linked Google® or Facebook® account, or your organization's SSO.
Select Design Functionality
This next page of the Installer allows you to specify which features are installed initially. The PCB Design option provides the base software and core technologies required to perform PCB design. It is always installed and cannot be deselected. Use the remaining options to tailor the installation to suit your needs. This will also have an impact on the initial installation time!
Click to expand an area for greater control over the sub-functionality available.
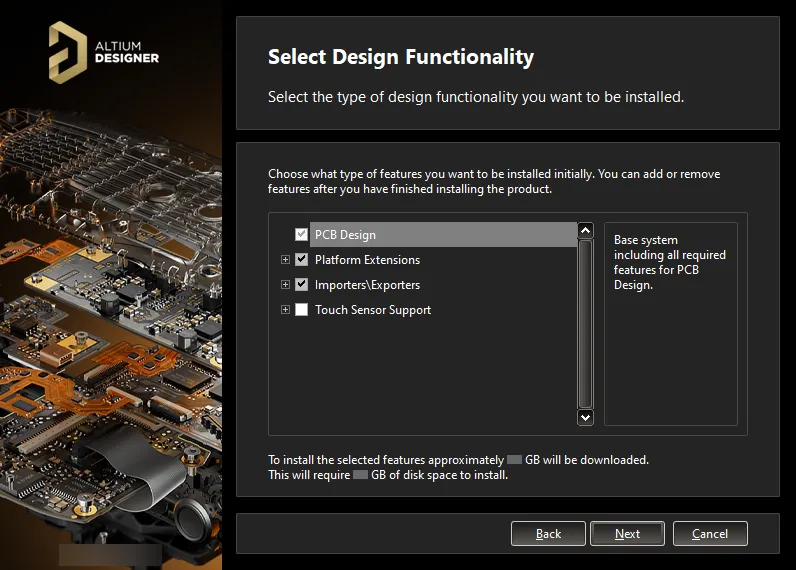
What initial functionality would you like in your installation of Altium Designer? The choice is yours! This can be changed later if required.
Platform Extensions offer extended functionality to the core platform. Each platform extension is a dedicated package of core platform functionality that has been 'brought out' of the platform and delivered in the form of an extension. By delivering this functionality as an extension, Altium can deliver updates to that core functionality without having to release an update to the entire platform itself.
Click to enable the functionality you require. Click to enable functionality at the parent level to quickly enable all of its child functionality too. As you select and deselect functionality, the text at the bottom of the page dynamically updates to reflect the size of the download involved and how this translates to required disk space once those downloaded files are installed. Note that the figure given for the amount of downloaded data does not apply to the Offline Installer.
Remember, no matter what decision you take at the initial installation, you can add or remove features and functionality at any stage after installation. This puts you in the driver's seat to fully customize your installation in line with your possibly ever-changing design needs. Refer to the Changing Installed Core Functionality after Installation section to learn more.
After defining the functionality you would like, click  to proceed.
Destination Folders
This next page of the Installer allows you to specify the destination folders for the installation in terms of both the Program Files for the software and the Shared Documents that are accessed and used by the software.
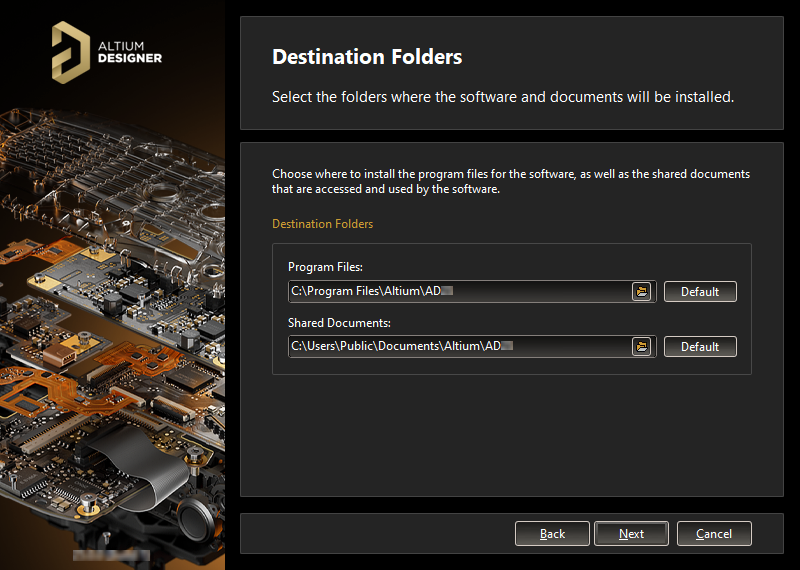
Specify where the software and associated documents are to be installed.
These locations become especially important when installing multiple instances of Altium Designer. If one or both of these destinations is not currently an empty folder (i.e., devoid of content), you will be prevented from proceeding with the installation until you specify alternate (and empty) destination(s).
The default destinations are:
To specify alternate locations, type the location directly into the applicable field or click the folder icon at the right of a field and browse for the required destination folder.
Once the install locations are specified, click  to continue.
Customer Experience Improvement Program
This page is used to choose whether to participate in the Customer Experience Improvement Program. Altium uses the program to enhance our understanding of how our customers use Altium products and services. The data is transmitted via a secure connection so your privacy is protected. You do not need to send us anything; your computer will automatically send usage information to Altium servers, and participation will not impact software performance or cause any work interruptions. The data we collect cannot be used to recreate your work, products or designs.
To participate in the program, enable Yes, I want to participate. To opt out of participation, enable Don't Participate.
Since this program requires a connection with Altium, it is not required for an offline installation. Therefore, you can choose the Don't participate option.
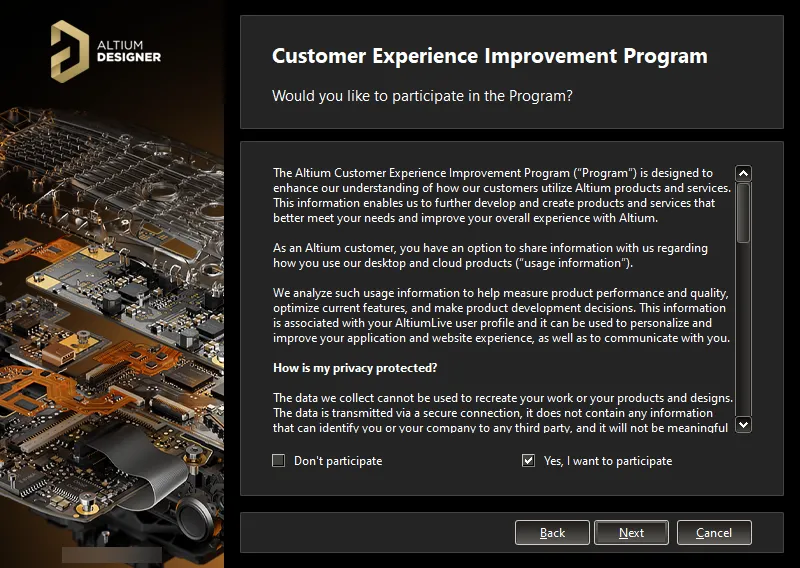
Choose whether to participate in the Customer Experience Improvement Program.
If you initially selected not to participate in the program but later would prefer to (or vice-versa), you can configure this after installation. The option to participate or not is available from the System – Product Improvement page of the Preferences dialog (accessed by clicking the  button at the top right of the design space). Alternatively, you can enable/disable participation using the Product Improvement option on the System – Network Activity page of the Preferences dialog.
Rest assured that no personal data or design/IP information will be collected by participating in this program. Participation in this program is strictly voluntary and anonymous, and you are free to stop participating in the program at any time. For the rules that govern the program, see the Altium Designer Improvement Program page.
Ready To Install
The Installer now has all the information required to proceed with the installation. If you need to change anything, click the  button. If you want to cancel the installation, click
  .
.
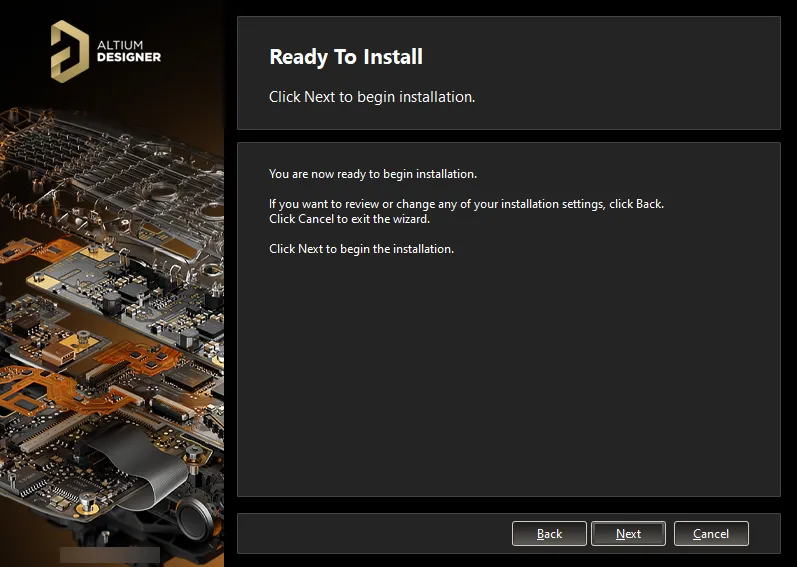
Ready to begin the installation!
To go ahead and proceed with the installation, click  .
.
Installing Altium Designer
The page will change from Ready to Install to Installing Altium Designer, and the installation will proceed with the required files first being downloaded (from the Altium Cloud Repository when using an Online Installer) or prepared (from the set of files contained within the unzipped Offline Installation package when using an Offline Installer). Progress of this download/preparation is displayed within the Installer itself.
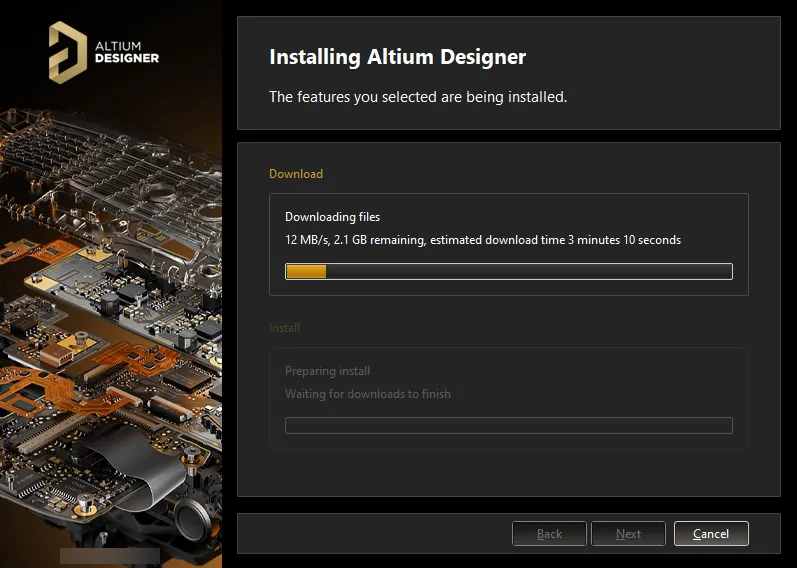
Installation commences by downloading/preparing the required set of install files.
Once the download/preparation of files is complete, they will be installed, again with progress displayed in the Installer.
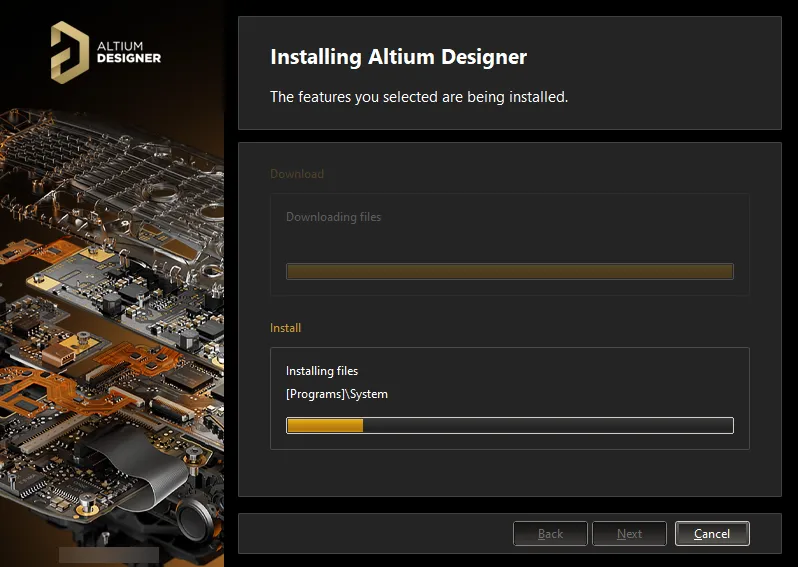
After the download/preparation is complete, the software is then installed.
Installation Complete
When the installation itself is complete, you have reached the end of the Installer wizard.

Installation is complete!
The Run Altium Designer option is provided to launch Altium Designer when you exit the Installer, which is enabled by default. Click  to exit the wizard.
You have installed Altium Designer on your computer and initially tailored its functionality to suit your design needs. Now it is time to do what you do best and go create that next innovative (and hopefully lucrative) product!
-
If you are new to board design and/or Altium Designer and wondering where to begin, this tutorial will take you from a blank schematic sheet all the way to generating the files needed to manufacture the PCB for a simple circuit: Tutorial - A Complete Design Walkthrough with Altium Designer. The tutorial touches on many of the areas of Altium Designer that you will need to become familiar with in your day-to-day design work.
-
Within Altium Designer, the F1 shortcut is worth getting acquainted with. Hover the mouse over anything inside Altium Designer – a command, dialog, panel, or design object – and press F1 to access documentation for it. Also, if you are running a command, e.g., placing a component, and you are unsure how to rotate it, press Shift+F1 for a list of command-dependent shortcuts.
Installing Multiple Instances of the Software
When running the installer for a subsequent version of Altium Designer, an additional page of the Altium Designer Installer wizard will be available called Installation Mode. This page gives you the choice of either updating an existing version instance of Altium Designer or installing it as a separate new version instance. Choose the New installation option to maintain separate version instances of the software on the same computer. Remember to specify different destination folders for the new instance later in the wizard.

If you already have a previous installation of Altium Designer within the same version stream, you can choose to install it as a separate unique instance by selecting the New installation option as the mode of installation.
Installation Folders
There are two important factors that facilitate the installation of multiple individual version instances of the software:
-
The ability to specify different destination folders during the install in terms of both the Program Files and Shared Documents install locations.
-
The system's use of a Globally Unique Identifier (GUID) for each independent instance. This identifier, which uses the standard 128-bit URN model and is displayed as a 32-character hexadecimal number, is used to uniquely distinguish the application data folders, as well as entries in the registry. When you run a particular instance of Altium Designer, the system handles (through use of this identifier) only those files and registry entries specific to that instance.
The following is a summary of the default installation folders for Altium Designer:
-
The default main installation path for Altium Designer is:
\Program Files\Altium\AD<Version>
-
Examples, libraries, and templates for a default installation can be found in the following directory:
\Users\Public\Documents\Altium\AD<Version>
-
System application data (including Extensions, Portal Cache) and security files (license ALF) for a particular instance can be found in the following two directories:
\ProgramData\Altium\Altium Designer <GUID>
\ProgramData\Altium\Altium Designer <GUID>_Security
For two example instances, the paths might, therefore, be (inserting example GUIDs):
\ProgramData\Altium\Altium Designer {7DF7280E-CD03-40A9-A6A4-DDD057140F70}
\ProgramData\Altium\Altium Designer {7DF7280E-CD03-40A9-A6A4-DDD057140F70}_Security
\ProgramData\Altium\Altium Designer {566C1AFA-49CA-4B17-B7CB-70A2042D8DAC}
\ProgramData\Altium\Altium Designer {566C1AFA-49CA-4B17-B7CB-70A2042D8DAC}_Security
-
User application data files (including: DXP.rcs, UserTools.tlt, AdvPCB.dft, AdvSch.dft, last design space) for a particular instance can be found in the following directory:
\Users\<ProfileName>\AppData\Roaming\Altium\Altium Designer <GUID>
For two example instances, and a user profile of Des.Igner, the paths would, therefore be:
\Users\Des.Igner\AppData\Roaming\Altium\Altium Designer {7DF7280E-CD03-40A9-A6A4-DDD057140F70}
\Users\Des.Igner\AppData\Roaming\Altium\Altium Designer {566C1AFA-49CA-4B17-B7CB-70A2042D8DAC}
-
User local application data for a particular instance can be found in the following directory:
\Users\<ProfileName>\AppData\Local\Altium\Altium Designer <GUID>
For two example instances, and a user profile of Des.Igner, the paths would, therefore be:
\Users\Des.Igner\AppData\Local\Altium\Altium Designer {7DF7280E-CD03-40A9-A6A4-DDD057140F70}
\Users\Des.Igner\AppData\Local\Altium\Altium Designer {566C1AFA-49CA-4B17-B7CB-70A2042D8DAC}
Identifying the Right Folder
For the main program installation and shared documents folders, you have the ability to give those folders meaningful names, which can come in very handy for a machine containing multiple different version instances of the software. But for other folders, they are only distinguished by their GUID. Being able to tell that you have the right folder for the right version instance suddenly becomes more difficult. However, help is at hand. By using the Preferences dialog, you can quickly identify the GUID used for the currently open instance of the software. Armed with that knowledge, you can pick the right folder through Windows Explorer.
The GUID can be identified on the following pages of the Preferences dialog (in a standard default installation of Altium Designer):
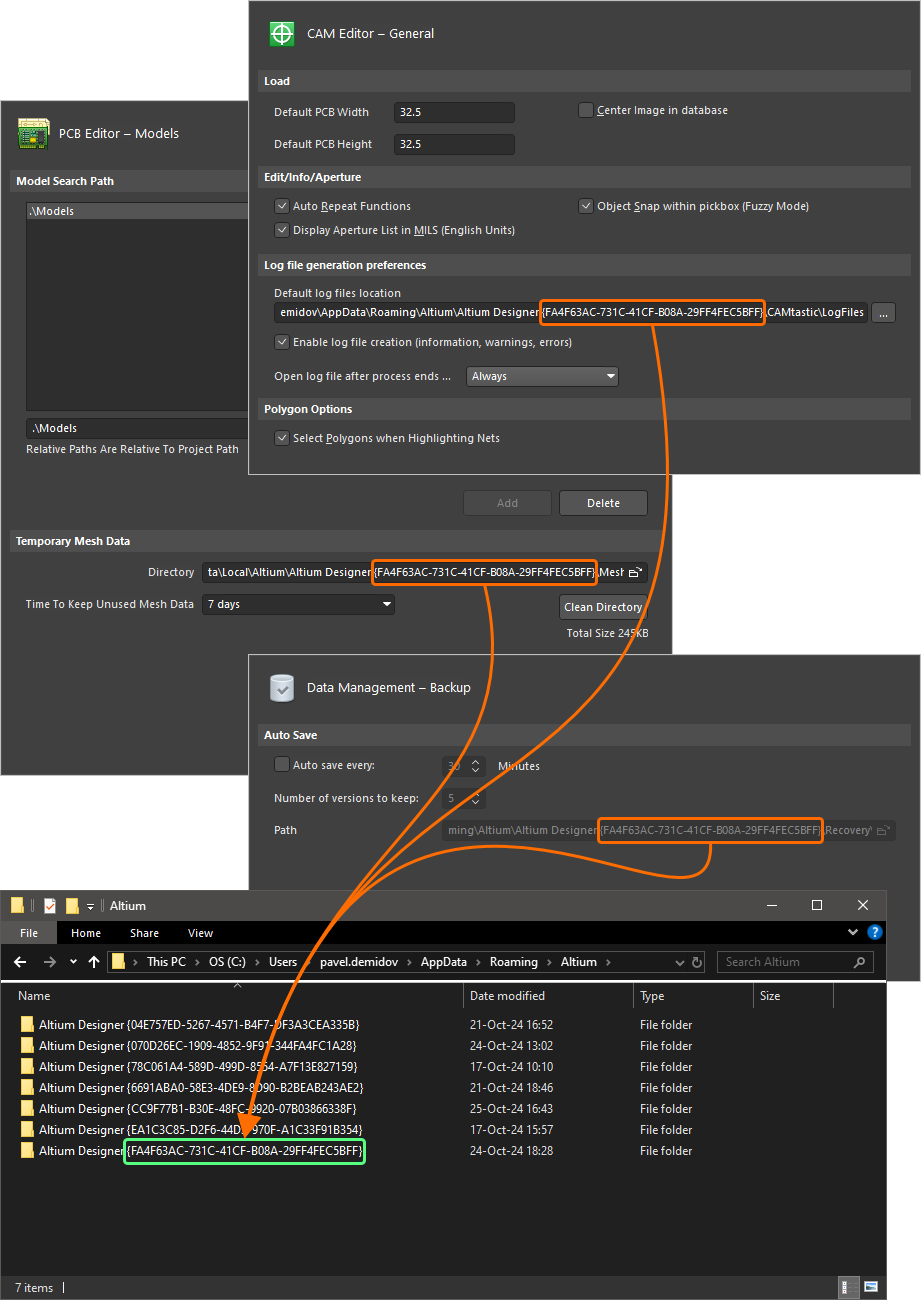
Identifying the GUID used for the active version instance of Altium Designer.
To update an existing version of Altium Designer, choose the Update existing version option on the Installation Mode page of the Installer, then use the drop-down field to select the specific instance of the software you wish to update. Refer to the Updating from Windows section to learn more.
Importing Preferences from a Previous Version or Major Release
After installing and launching your new version of Altium Designer, the Import settings dialog will open. In this dialog, you can choose to import preferences from the most recent previous installation at startup.
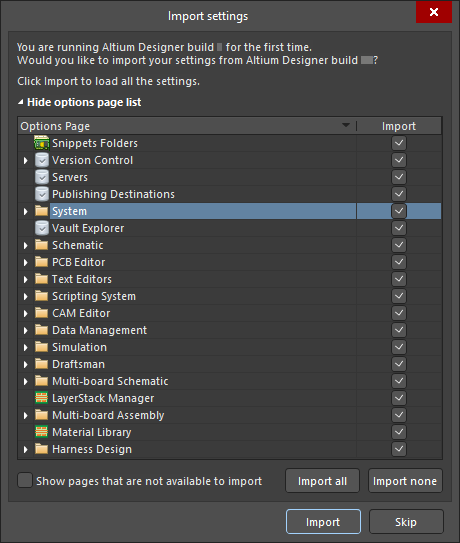
Import settings from your previous version's installation.
Not only will the preferences be imported, but the user settings will also be copied across – ensuring the new version opens with the same look and feel created in the previous version, even down to the last opened project group and panel positioning!
If the option to import preferences upon initial startup is not taken, do not worry – preferences can be quickly imported at any time from within the Preferences dialog. Refer to the Accessing, Defining & Managing System Preferences page to learn more.
The benefit of importing at the initial startup is getting the working environment looking exactly the way it was set up in the previous installation. Importing preferences at a later stage will only 'restore' a subset of this environment.
Preferences can be imported from any individually installed version instance of Altium Designer (installed builds of AD10 or later), or any of the following pre-AD10 major releases of the software: Summer 09, Winter 09, Summer 08, and Altium Designer 6.
Browsing Installed Functionality
Information about your current installation can be readily seen from the Installed page of the Extensions and Updates view. To access the page, click on the Current User control at the top right of the design space, choose  from the menu, and then click Installed at the top of the view.
The page presents the following information:
-
The version of the main Altium Designer platform currently installed, along with the user (and computer name) and Company Account under which a valid license of the software is being used. License/subscription notification information is also presented here. When the license/subscription status requires attention, its overview text is highlighted in red – this can be due to an invalid license, an expired (or soon expiring) subscription, or a portal connection issue.
-
The system extensions currently installed.
-
The software extensions currently installed.
To learn more about extensions, refer to the Extending Your Installation page.
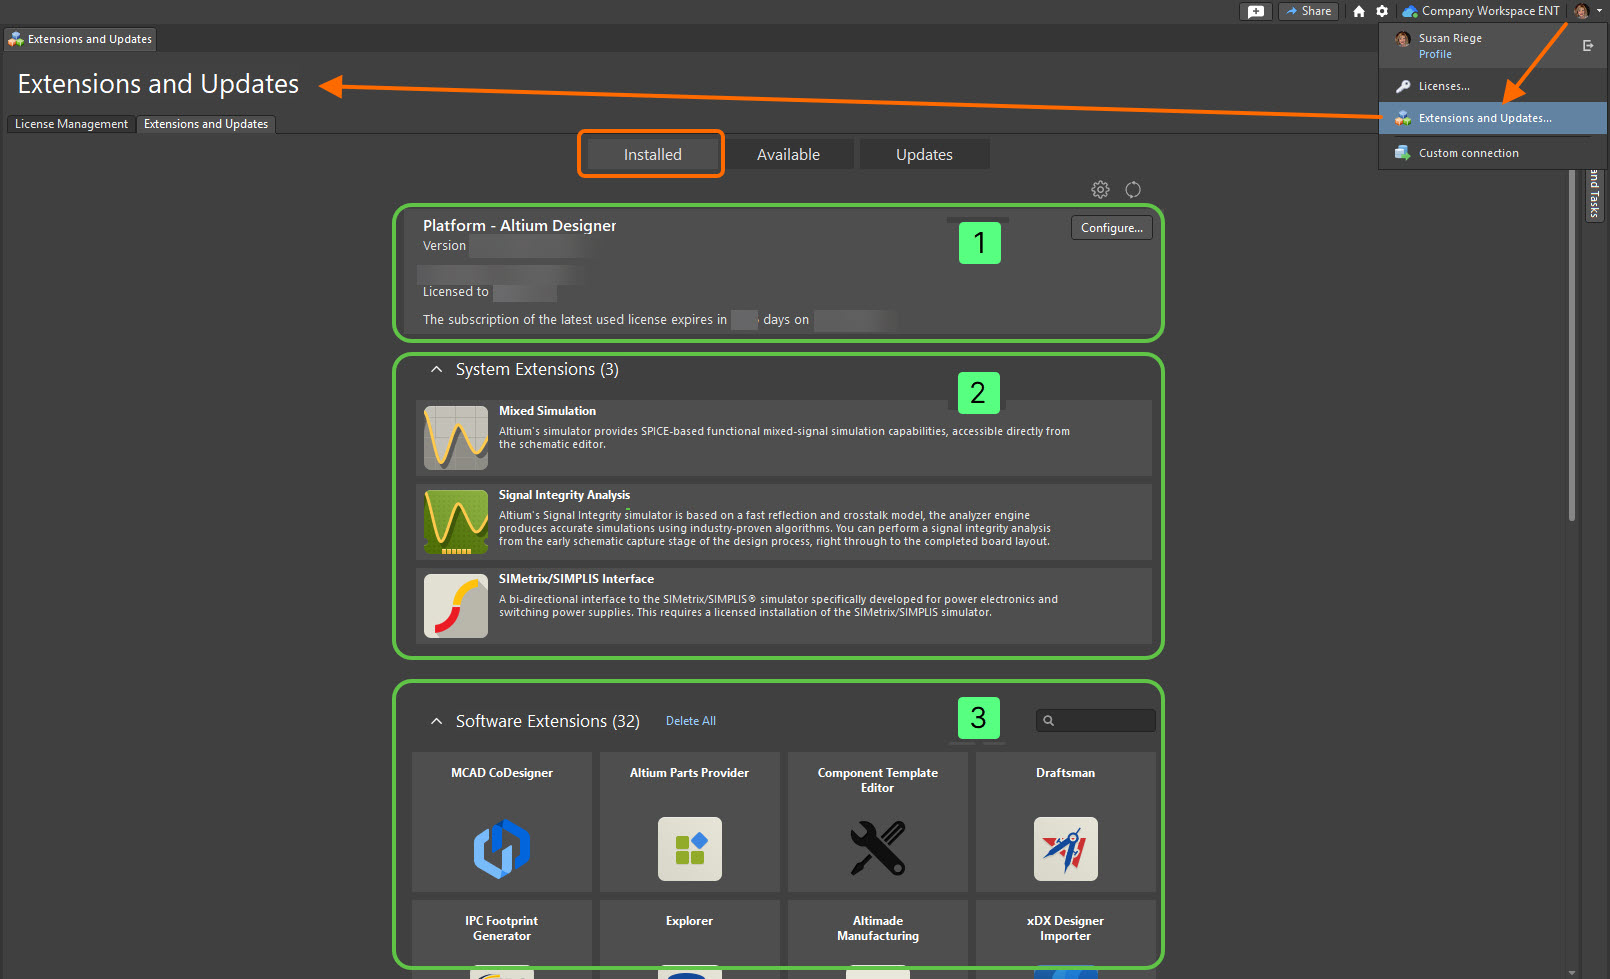
Access the Installed page of the Extensions and Updates page for a summary of what is currently installed in your instance of Altium Designer.
Changing Installed Core Functionality after Installation
During initial installation of Altium Designer, you have a choice over the core design functionality you want to be installed (refer to the Select Design Functionality section to learn more). This choice is not 'set in stone', however, and can be modified at any time after installation. This can be performed in two places:
-
Internally from within Altium Designer from the Installed page of the Extensions and Updates view.
-
Externally from within Windows from the standard Programs and Features page (accessed from the Control Panel).
Changing Core Functionality from Altium Designer
-
Access the Extensions and Updates view (click on the Current User control at the top right of the design space then choose  from the menu) and switch to the Installed tab.
-
Click the  button at the top right of the Platform region. This accesses the Configure Platform page, which presents Altium Designer's core feature set, including platform extensions. The page is identical in content to that found on the Select Design Functionality page of the Altium Designer Installer.
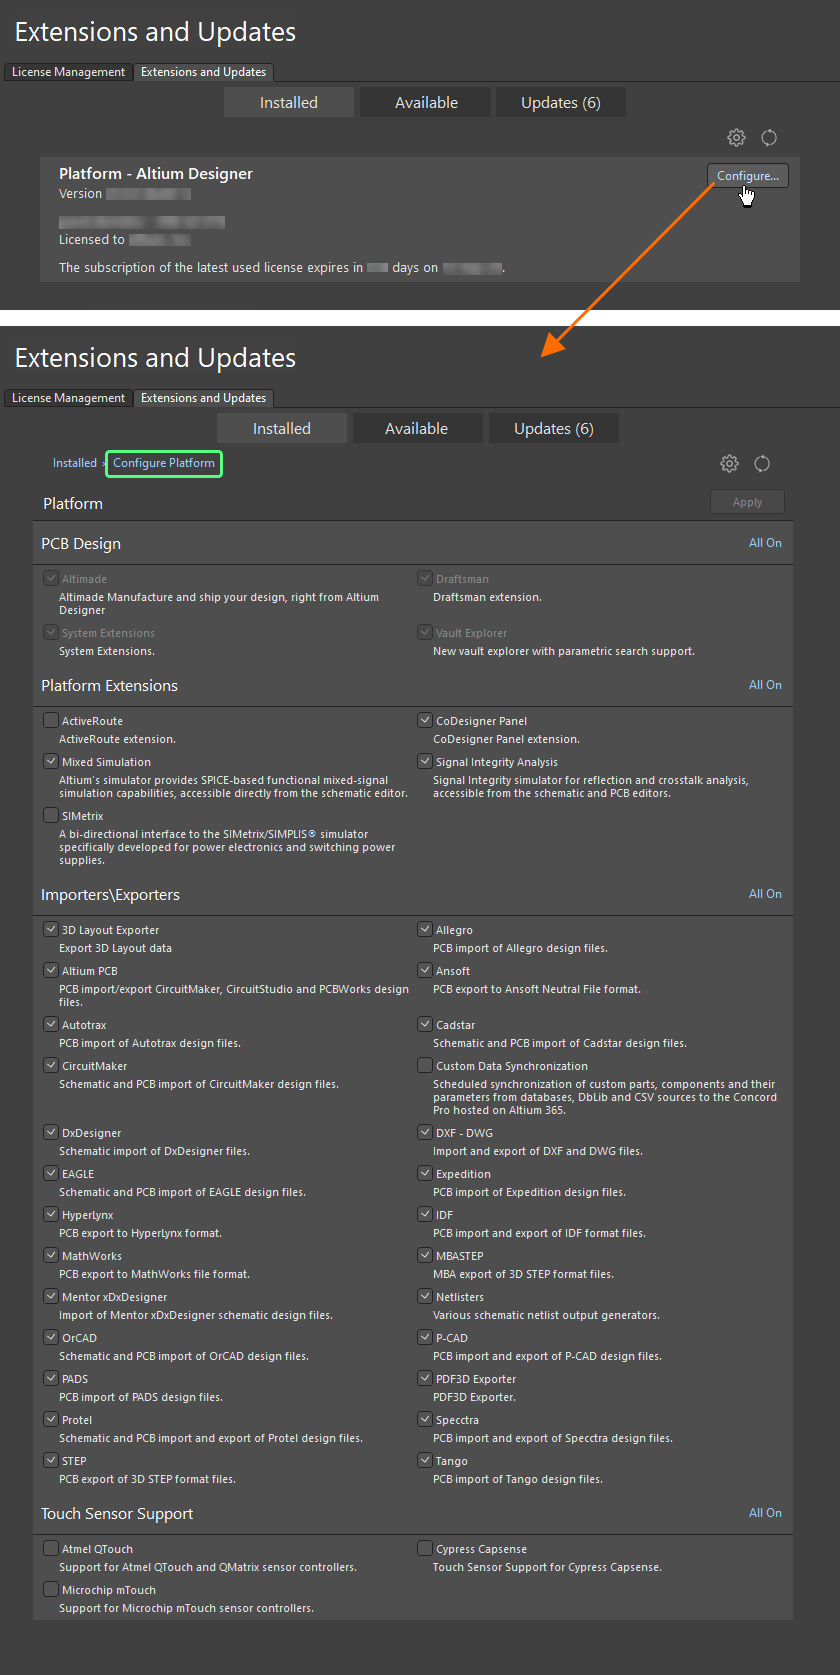
Configure the core functionality for your installation directly from within Altium Designer.
-
Make changes to the installed core feature set as required by checking/unchecking the box next to a feature. Modifications are distinguished by the applicable entry becoming bold. Quickly enable all features in a particular section for installation using the corresponding All On control at the top right of that section.
-
Once modifications have been made, click the  button at the top right of the page. A confirmation dialog will open. Click OK to apply the changes and restart Altium Designer. The instance of Altium Designer will close, and a window will appear (essentially the Installing Altium Designer page of the Installer wizard) showing progress in downloading and installing the files required to implement the change(s).
-
Altium Designer will then be restarted.
To return to the main view of the Extensions and Updates view's Installed page, either click the Installed tab or click on the Installed part of the breadcrumbs at the top left of the page.
Changing Core Functionality from Windows
-
Access the Programs and Features page through the Windows Control Panel then right-click on the entry for Altium Designer <Version> and use the Change command from the context menu.
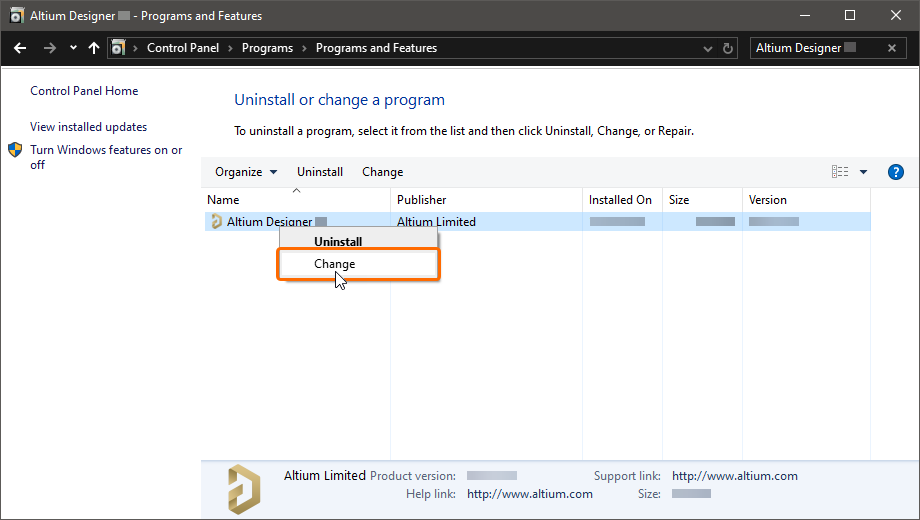
Modify the installation at any stage by changing the core functionality installed.
If you have installed multiple instances of Altium Designer, ensure changes are being made to the correct instance. It can be a good idea to have the Version attribute displayed as an additional column on the Programs and Features page so that the correct instance can be quickly verified.
-
The Altium Designer Installer wizard will be presented. Log in through the Account Log In pop-up window, and you will be taken to the Select Design Functionality page (refer to the Select Design Functionality section to learn more about the page). Make changes to the installed core feature set as required then click  .
.
-
The Ready To Modify page will be presented. At this point, the Installer has all the information it requires to proceed with modification of the installation. If you need to change anything, click the  button. If you want to cancel the install, click
  . To proceed with the modification, click
  . The page will change to Modifying Altium Designer, and the files required to implement the change will be downloaded and installed.
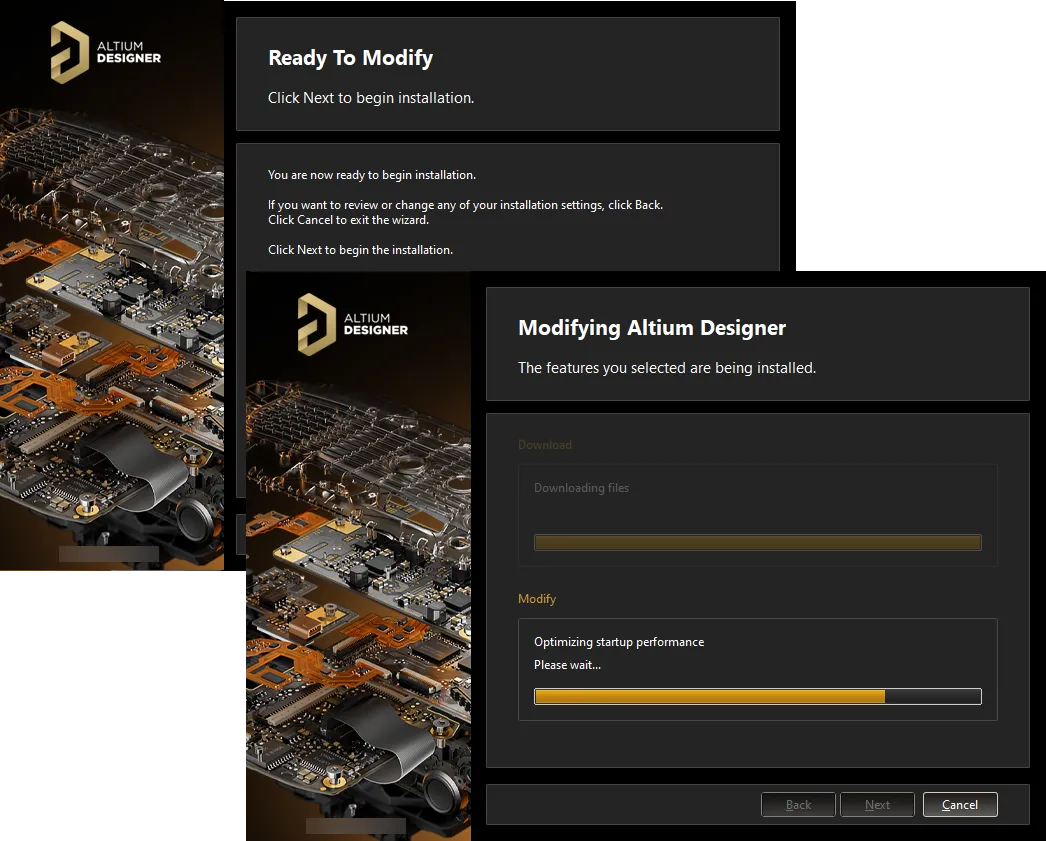
Modification of the installation proceeds by downloading the files required to implement desired changes to the software. Once downloaded, those files will be installed.
-
The modification to the installation is now complete. An option is provided to launch Altium Designer when you exit the Installer, which is enabled by default. Click  to exit the wizard.
Updating to a Later Version
Altium Designer, i.e., the platform itself, can be updated from two places:
When using a Standalone or Private Server license, you may need to reactivate/refresh that license to be able to access and use new features and functionality when you update your Altium Designer installation to a newer version.
Alternatively, a license file (ALF) can be activated by a Group Administrator or License Administrator through the Company Dashboard. Switch out your current license for this newly-activated one.
It is advised to restart Altium Designer after reactivating/refreshing any licensing.
Updating from Altium Designer
Access the Updates page of the Extensions and Updates view to browse a listing of all software elements of Altium Designer, for which there is an update, including Platform Updates.
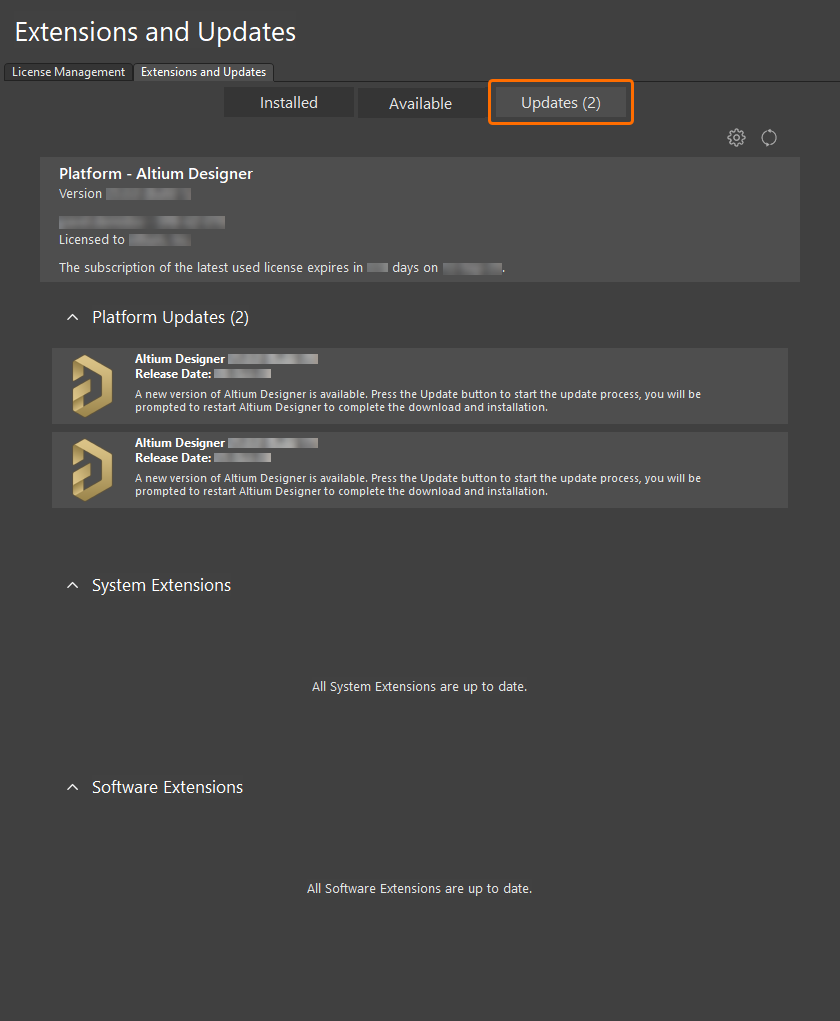
Browse whether the main platform has an update available.
In the Updates page banner area, click  to refresh the update and license information or the
  to configure Altium Designer’s installation and update notification settings. The latter opens the System – Installation page of the Preferences dialog, where you can configure how frequently Altium Designer will check for software updates and notify you (
 ). Note that an option is available to check for new updates each time Altium Designer is activated. This is the On Start-up setting in the Check Frequency drop-down menu.
Depending on how you have configured your automatic checking for updates, a pop-up dialog will open when you launch Altium Designer notifying you that a later version of the software is available. Clicking Yes will take you directly to the Updates page of the Extensions and Updates view.
Installing a new version of the platform will automatically install any related extensions that also have updates. Conversely, updating an extension that requires a later version of the core platform will result in the update to that core platform also. To learn more about updating an extension, refer to the Extending Your Installation page.
Those using Altium Designer with a Standalone, Private Server, or On-Demand license (in roaming mode) or those with an expired Altium Subscription can see what software updates are available regardless of log-in status. Note that you need to be logged in and have a valid license/subscription to download and install updates.
-
Access the Extensions and Updates view (click on the Current User control at the top right of the design space, then choose  from the menu) and switch to the Updates tab.
-
In its Platform Updates region, the page presents all available Altium Designer platform updates arranged in chronological order to provide a historical view of platform changes since the last update. The most recent version build incorporates the changes from all previous updates. To view further information on any platform update, click on the name to open a detailed view. In most cases, this will provide an expanded description of the update's function and Release Notes that summarize its changes over the previous version.
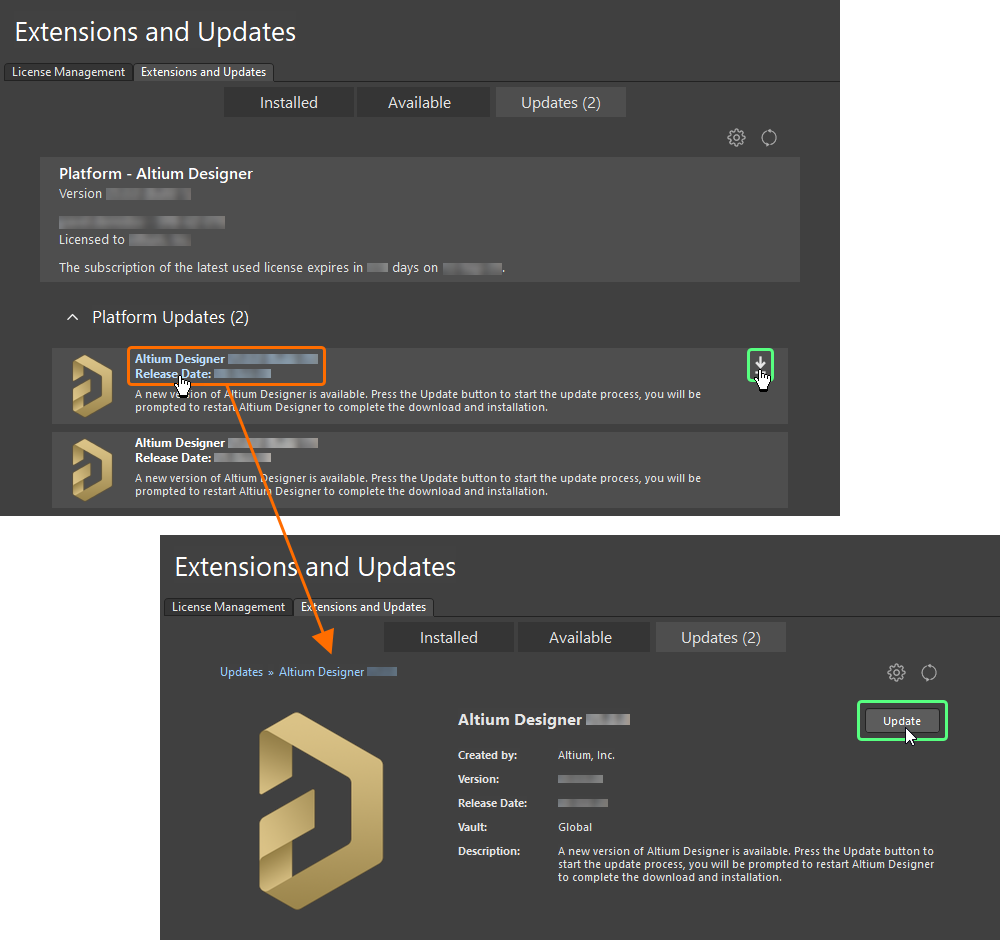
Update to a new version of Altium Designer directly from within the current version.
-
To download and install a software update listed on the summary-level Updates page, click its associated  icon that appears when you hover the mouse cursor over the update entry name (hovering over the icon also reveals the version number of the new update). Alternatively, if browsing the detailed view for the update, click the
  button. If your license or subscription status does not allow the update, or you are not signed in to your Altium Account, a warning message will pop up to indicate the issue.
-
A progress bar will appear that shows the progress of the download (essentially getting the installer for the later version from the source repository). Should you need to cancel the update, click its associated cancel icon ( ).
).
-
A confirmation dialog will open, alerting you that a restart is required to install the platform update; click Yes. The instance of Altium Designer will close and a window will appear (essentially the Updating Altium Designer page of the Installer wizard) showing progress in downloading and installing the files required to implement the update.
-
Altium Designer will then be restarted.
Verification that you now have the later version of the platform installed can be made either from any page of the Extensions and Updates view or from the Help » About splash screen.
Updating from Windows
Updating your current instance of Altium Designer to a later version is performed during installation of that later version.
-
Download and run the AltiumDesignerSetup_<Version>.exe file associated with the latest version of the software.
-
Follow the installation process using the Altium Designer Installer for the new version. After agreeing to the End-User License Agreement, you will be presented with the Installation Mode page. This page gives you the choice of either updating an existing version instance of Altium Designer or installing it as a separate new version instance. Choose the Update existing version option then use the drop-down field to select the specific instance of the software you want to update. The Programs and Documents install locations will be summarized based on the chosen instance.
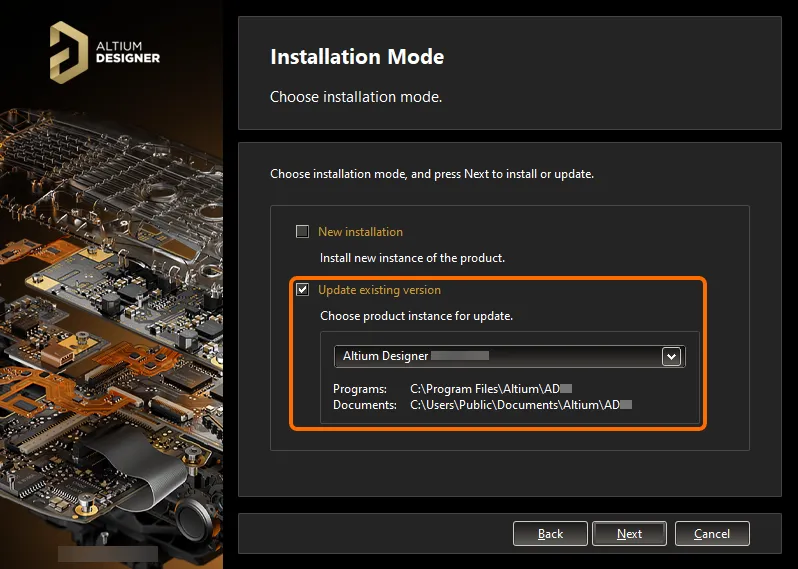
Choose to update an existing instance of Altium Designer during installation of a later version of the software.
-
Click  . The Ready To Update page will be presented. At this point, the Installer has all the information it requires to proceed with the update of the existing installation. If you need to change anything, click the
  button. If you want to cancel out of the installation, click
  . To go ahead and proceed with the update, click
  .
.
-
Login through the Account Log In pop-up window. Once this is done, the page will change to Updating Altium Designer and the files required to implement the update will be downloaded and then installed.
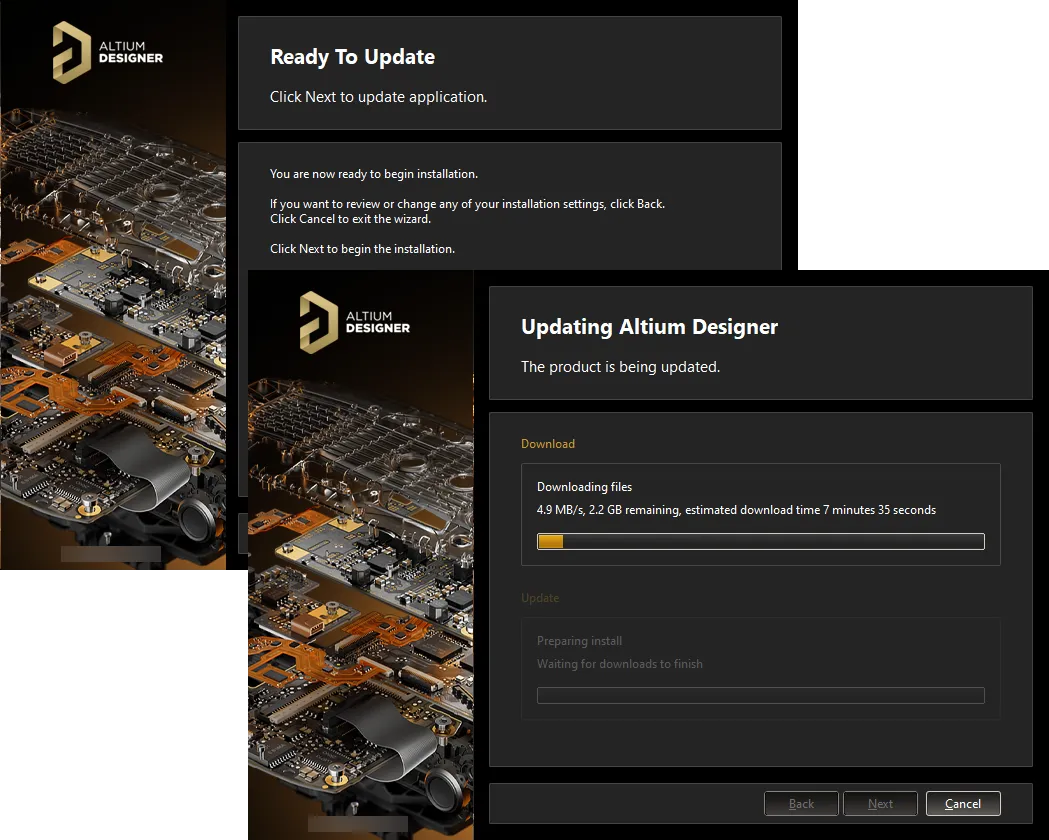
Update of the installation proceeds by downloading the files required to implement required changes to the software. Once downloaded, those files will be installed.
-
The update to the installation is now complete. An option is provided to launch Altium Designer when you exit the Installer, which is enabled by default. Click  to exit the wizard.
Uninstalling
Uninstalling Altium Designer is performed using the Altium Designer Uninstaller. This wizard-based uninstaller is accessed from the standard Programs and Features page (accessed from the Control Panel). Right-click on the entry for Altium Designer <Version> and use the Uninstall command from the context menu.

If you have installed multiple instances of Altium Designer, ensure that the correct instance is being uninstalled. It can be a good idea to have the Version attribute displayed as an additional column on the Programs and Features page so that the correct instance can be quickly verified.
The Altium Designer Uninstaller wizard will be presented.
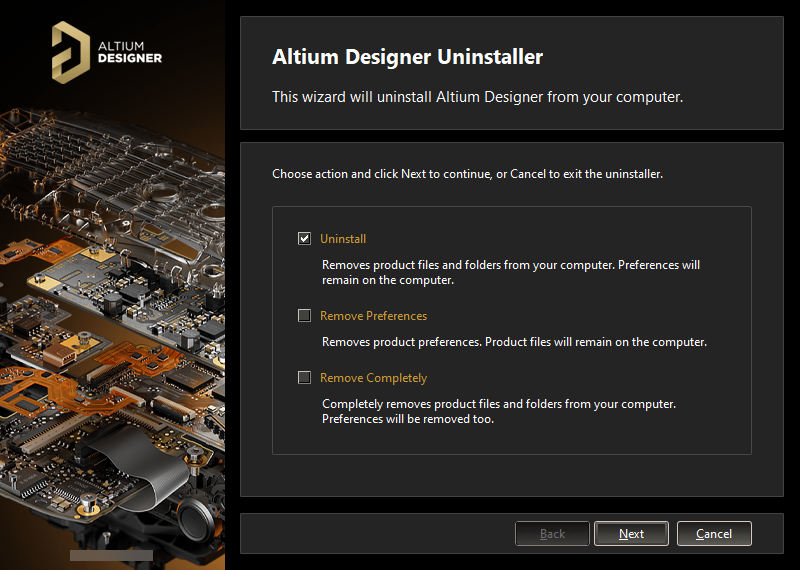
Uninstalling the software is streamlined, courtesy of the Altium Designer Uninstaller.
Three actions are provided, facilitating varying degrees of 'uninstall' as follows:
-
Uninstall – removes the install folders (program files and shared documents locations) but leaves preferences-based folders alone. This enables you to have a build that is not currently installed, but whose preferences can still be reused, for example, by importing into another installed version.
-
Remove Preferences – removes just the preferences-based folders, covering system application data and security files, user application data files, and user local application data.
-
Remove Completely – total removal of the entire installation (i.e. installation folders and preferences folders).
Choose the uninstall action required. If you want to cancel out of the uninstall, click  . To proceed with the uninstall, click
  . The page will change to Uninstalling Altium Designer and the chosen action will be processed. Once the uninstall is complete, click
  on the Uninstallation Complete page of the Uninstaller.

The Altium Designer Uninstaller in action