BOM Components

This document is no longer available beyond version 17.1. Information can now be found here: BOM Management with ActiveBOM for version 25


Parent article: ActiveBOM

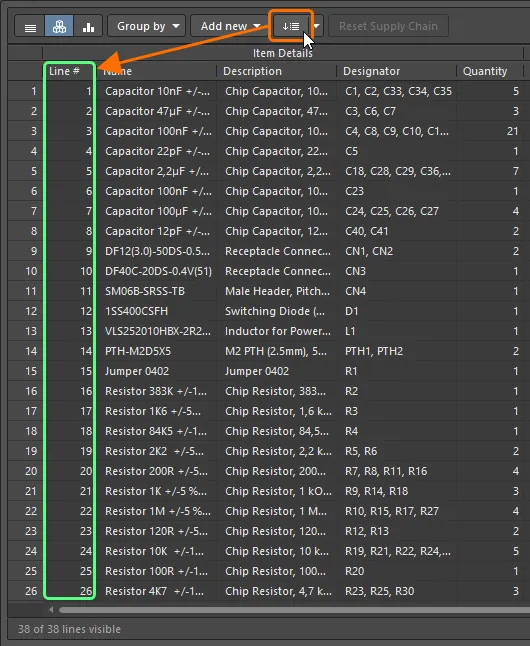
The BOM Components tab is a constituent part of the BOM document (*.BomDoc), and a key structural element in the ActiveBOM concept. It presents the BOM itself – a listing of all instances of components used in the design (core catalog items, managed and unmanaged), along with instances of extra items added from the BOM Catalog as required. Use this tab to fully-customize the appearance of the data and to obtain the BOM content you need all in your preferred layout.

Getting the raw data configured as desired at the BOM document level ultimately streamlines BOM output as part of an Output Job file when it comes time to generate the manufacturing data.

Breaking-down the BOM Components tab.Breaking-down the BOM Components tab.

The tab is divided into three key regions:

  1. All Columns – lists all available data 'columns' that can be included in the BOM. These attributes are sourced from the properties of all components used in the board design.
  2. Grouped Columns – provides the ability to group BOM components by one or more specific attributes.
  3. Data –  shows information for each enabled data column.

If supply chain data is not being presented for one or more BOM components, ensure that ranking has been applied to at least one solution for the corresponding items in the BOM Catalog. This is required for the software to know where to present the data (Solution 1, Solution 2, or Solution 3).

Manipulating Data Columns

Controls are provided to show, hide and move data columns as required – giving you the ability to massage content of the BOM to meet manufacturing (and documentation) requirements.

Showing Columns

To enable a data column – for inclusion into the main data grid – simply enable the Show option, to the right of its entry in the All Columns region.

Each enabled column will list information for each of the components, where such information exists. If a component does not have any information for that particular property, the field will be blank.

Grouping Columns

Components can be grouped together by one or more specific attributes. To do so:

  1. Click, drag and drop the desired information column from the All Columns region into the Grouped Columns region.
  2. The column heading appears in the Grouped Columns section and the data in the main grid is updated to display according to the new groups.
  3. Click, drag, and drop to group by other columns as required.

Within the Grouped Columns region, use drag and drop to redefine the grouping 'sort order' as required.

To stop grouping by an attribute,  click and drag that attribute from the Grouped Columns region back into the All Columns region. To have a flat listing of all core components (and additional Extra items) in the BOM, ensure there is no grouping (no attributes in the Grouped Columns region).

Changing Column Order

The order of the columns in the main data region can be changed from the All Columns region or from within the data region itself:

  • From the All Columns region – drag and drop a column to the new required position in the list. Repeat until the ordering of the columns is as required.
  • From within the data region – click on the header for a column and drag it horizontally to the required position. A valid position is indicated by the appearance of two vertical green positional arrows.

To see all data columns presented in the data region – within the extents of the viewing area – click the View Options control (above the Grouped Columns region) and choose Force Columns to View. This command is also available from the main data grid's right-click menu.

Sorting Data within Columns

Data in the grid can be sorted within one or more data columns. To do this, click on a column header (away from the far right drop-down arrow) to toggle the sorting of the information between ascending and descending order. All columns will be affected, but the rows will be sorted according to the information column whose header you click on.

Use Shift+click on column headers to sort the data within multiple columns. Use Ctrl+click on a column header to remove sorting within that column.

If data is not displaying fully within a column, click the View Options control (above the Grouped Columns region) and choose Column Best Fit. This command is also available from the main data grid's right-click menu (or by use of the Ctrl+F shortcut). This feature lengthens the width of each column according to the longest field entry. Note, however, that this feature is not available if you are already using the Force Columns to View feature.

Filtering

Filtering can be applied to show specific component entries. Click on the far right drop-down arrow in a column's header (in the main data region) and select from the individual row entries available. Alternatively, for greater filtering control select (Custom...), which displays the Custom AutoFilter dialog. Use this dialog to set up a custom filter to meet your requirements by specifying which rows of information you want to show based on filter criteria you apply to the data column. After click OK, filtering based on that criteria will be applied. A textual representation of the filtering currently in effect for the whole data region will be presented at the bottom of the region.

If filtering is currently being applied to a data column, its associated drop-down arrow will appear blue (filtered) rather than black (unfiltered).

Filtering can be applied to multiple data columns. Each 'column filter' becomes an AND'ed condition in the overall filter. To clear filtering for a column, choose the (All) entry from the filtering drop-down. To clear filtering completely, click the small cross to the left of the textual representation of the filter.

Adding Manual Components to the BOM...

The BOM will automatically include all core components (both managed and unmanaged) used in the board design. However, to gain a richer, more complete BOM, you can also add instances of 'manual BOM components'. These are sourced from those 'Extra' items that have been manually added to the BOM Catalog (Extra-Managed, Extra-Reserved, Extra-Place Holder, and Extra-Process). This can be performed from within either of the tabs of the BOM document.

...from the BOM Catalog Tab

To add instances of a single 'Extra' catalog item, select the required item and click the Add to BOM control (above the Item Detail grid). The Add to BOM Components dialog will appear. Use this to specify the Designator Prefix, an optional Separator, and the Quantity of the component required. After clicking OK, the Add new instances to BOM dialog will appear, confirming how many instances of the selected catalog item have been added to the BOM. Switch to the BOM Components tab to view the result.

An example of adding instances of a single 'Extra' catalog item to the BOM.An example of adding instances of a single 'Extra' catalog item to the BOM.

To add instances of multiple 'Extra' catalog items simultaneously, multi-select the required items and click the Add to BOM control. The Add BOM Components for selected Catalog Items dialog will appear. Use this to specify the Designator Prefix, optional Separator, and Quantity for each item as required. This can be performed in two ways:

  • Globally – simply type in these three fields to apply to all items in the list.
  • Selectively – select one or more items in the list, then click the links at the bottom of the dialog to set either Designator Prefix, Separator, or Quantity just for those selected items.

You can also define settings directly in the item list grid.

Duplicate Designator Prefixes are not allowed. So if you had two different items – both representative of diode components – you could not use 'D' for both items' prefix. And while using D1 and D2 would be a solution, multiple instances of both would initially result in non-contiguous designators. Considering a Quantity of 3 for each, this would give D11, D12, D13 and D21, D22, D23, instead of D1, D2, D3, D4, D5, D6. However, designators can always be fixed up once the instances have been added to the BOM.

After clicking OK, the Add new instances to BOM dialog will appear, confirming how many instances of the selected catalog item have been added to the BOM. Again, switch to the BOM Components tab to view the result.

When an instance of an 'Extra' catalog item is added to the BOM, its status will change from  (i.e., exists in the catalog, but is not used in the BOM) to  (i.e., is currently being used in the BOM).

Corresponding commands are also available from the right-click menu – use either Add instances of [<DesignItemId>] to BOM or Add instances of [n] selected items to BOM as applicable.

...from the BOM Components Tab

To add instances of a single 'Extra' catalog item, click the Add from Catalog control (above the main data region). The Add to BOM Components dialog will appear. All currently defined 'Extra'-type items available in the catalog are listed. Select the item that you want to add to the BOM. Use the fields below the list to specify the Designator Prefix, an optional Separator, and the Quantity of the component required. After clicking OK, the specified number of instances of the item will be added to the BOM.

The software will prevent duplicate designators. You will be prompted to enter a designator that is not currently in use within the BOM.

A corresponding command is also available from the main data region's right-click menu.

Editing Manual Component Designators

After manual components have been added to the BOM, you can modify their designators. To do so, simply select the entries for one or more components in the main data region, then right-click over the Designator field of a component in that selection and use the Edit Selected Component(s) Designator(s) command. The Change / Remove dialog will appear. This lists the current designator(s) and proposed new designator(s) (initially set to be the same). Edit the entries in the New Designator column for the components you wish to change and click OK to affect the changes.

Make changes to the designators of manual BOM components at any stage as required.Make changes to the designators of manual BOM components at any stage as required.

The software will prevent any change that would otherwise result in duplicate designators. You will be prompted to enter a designator that is not currently in use in the BOM.

Removing Manual Components from the BOM

To remove one or more manual components from the BOM, simply select the components in the main data region, right-click and use the Delete Selected Manual BOM Component(s) command.

Accessing the command to delete selected manual BOM components.Accessing the command to delete selected manual BOM components.

Removal can also be performed using the controls available in the Change / Remove dialog when editing component designators.

Components can be removed through the same dialog used to edit designators.Components can be removed through the same dialog used to edit designators.

First determine which components are to be removed either by:

  • Clicking on the Remove Component field for a component.
  • Selecting components in the list and clicking the Remove Selected button.

Components marked for removal will have the entry  in the Remove Component column. Click OK and the indicated components will be removed from the BOM.

Quickly specify all components to be marked for removal using the Remove All button. Similarly, clear all components from being removed using the Remove None button.

If all instances of a particular 'Extra' catalog item are removed from the BOM, the status of that item on the BOM Catalog tab will change from  to . An Extra-Reserved catalog item that was previously in the  or  state prior to addition to the BOM will not return to that state. Rather, it will also have the state .

Total Price

To help in costing by sheet, a Total Price column can be added to the BOM. For all components grouped in a line of the BOM, this displays the sum of the prices of those components multiplied by the specified production quantity, and taking into account any price breaks from the Supplier. Therefore, in terms of data presented in the BOM, this can be mathematically summarized as:

Total Price = Quantity x Supplier Unit Price x Production Quantity

Example showing use of the Total Price data column.Example showing use of the Total Price data column.

Viewing Lifecycle State

The LifeCycle State attribute is also made available for use in a BOM report. This enables you to see, at-a-glance, where each of the Vault-based components used in a design have reached in their life cycles, and visually verify their legitimacy - enabling you to catch, for example, components that are not for production, or have become obsolete, and make the required changes to the design, prior to embarking on what could prove a costly manufacturing spin.

Use the LifeCycle State attribute in your Active BOMs.Use the LifeCycle State attribute in your Active BOMs.

When configuring each individual state for a lifecycle definition, you have the ability to define additional state attributes that control the visibility, and applicability, of an Item revision - using that lifecycle definition - that finds itself in that state. In terms of applicability, a project compiler violation can also be configured to detect and flag any Vault items being used in a design, whose revisions are in non-applicable states - catching and averting issues prior to release. For more information, see Controlling Visibility and Applicability of an Item Revision.
You can also catch components that are being invalidly used within a design, during the design release process. Simply add and configure Component State Checking to your overall release validation regemin. For more information, see Component Status Validation.


If you find an issue, select the text/image and pressCtrl + Enterto send us your feedback.
Note

The features available depend on your Altium product access level. Compare features included in the various levels of Altium Designer Software Subscription and functionality delivered through applications provided by the Altium 365 platform.

If you don’t see a discussed feature in your software, contact Altium Sales to find out more.

Content